Review: How to Produce an Affordable Podcast with Multiple Mics
ATEN's new MicLIVE audio mixer, along with Audio-Technica's AT2040 and Shure's MV7 microphones, offer quality audio options on a budget.
When I used to produce podcasts, my setup was simple: It was me, a USB microphone, some sound absorption material, the occasional prerecorded interview, and recording/editing software. However, for many podcasters, the best content comes from conversations—but trying to use multiple USB mics on the same computer can be complicated. An external audio mixer is an easy solution for accommodating multiple inputs.
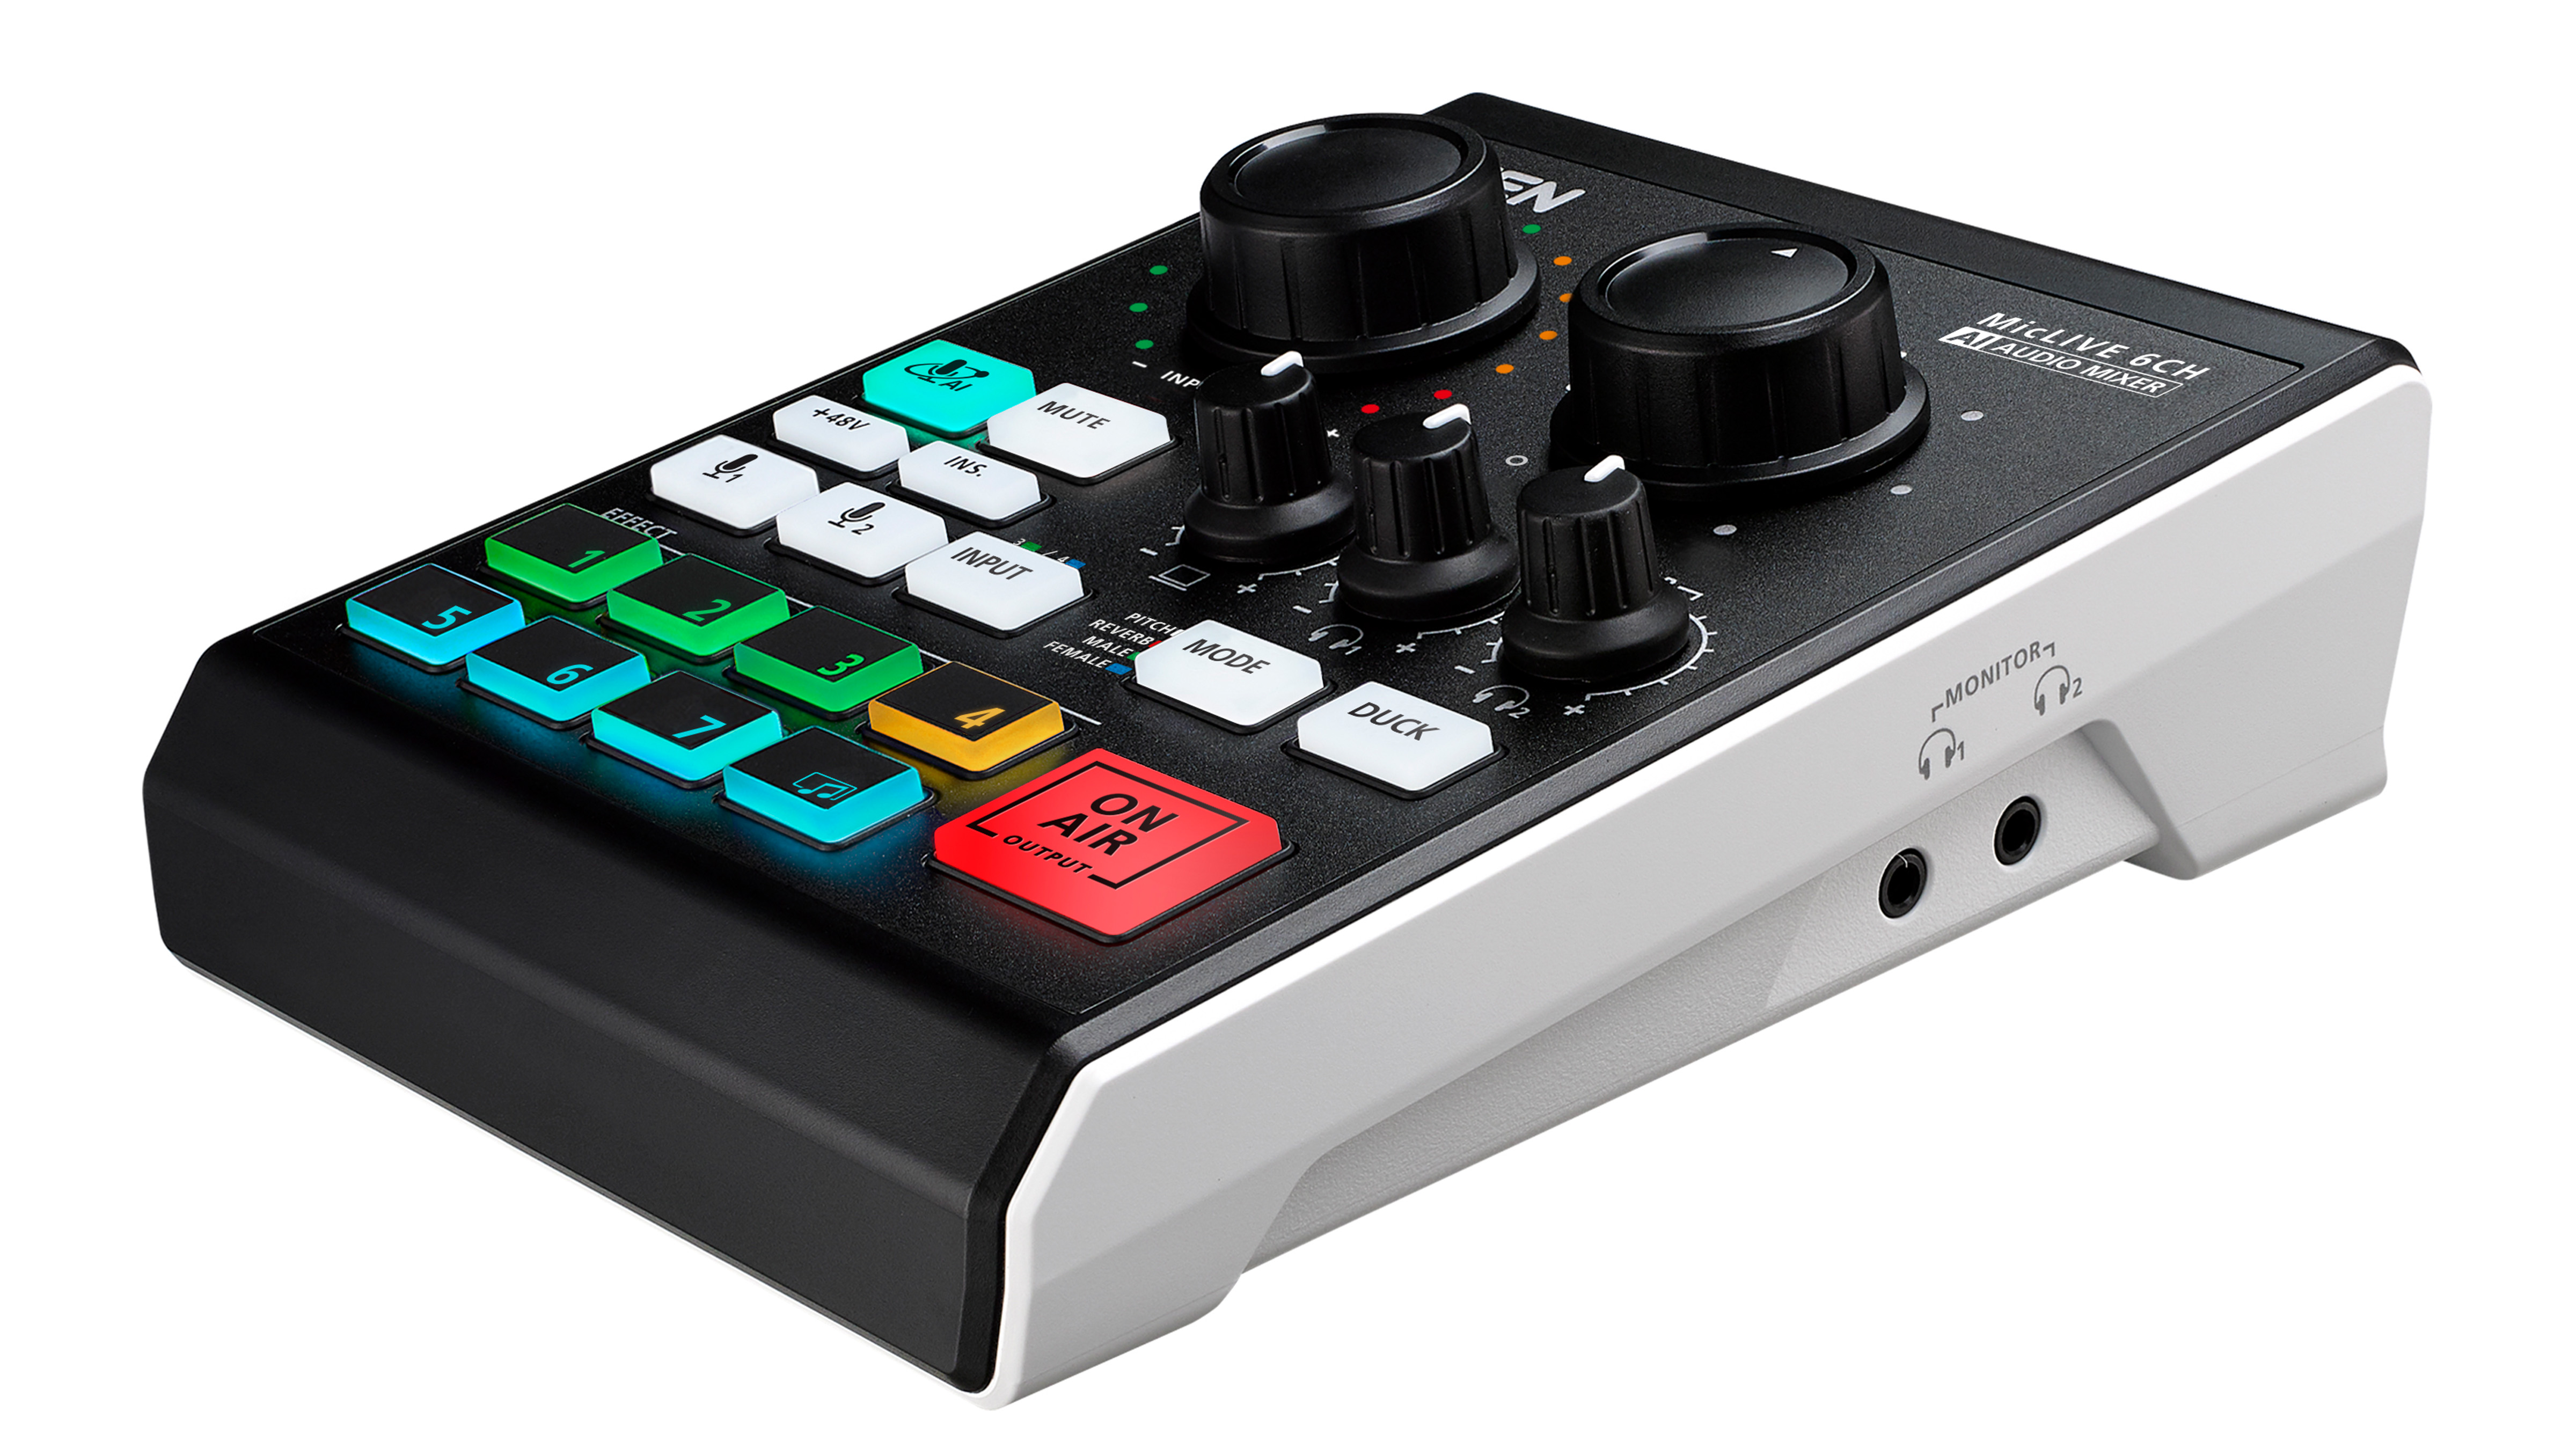
When I was given the opportunity to test a couple of XLR microphones, the Shure MV7 and the Audio-Technica AT2040 (more on those later), I figured it was a good opportunity to review a portable mixer as well. I found one in the ATEN UC8000 MicLIVE six-channel AI audio mixer. This miniature marvel is a great option for podcasters on a limited budget, and (with a little practice) can be easily managed by an on-air host.
Inputs 1 and 2 pull double duty as XLR and 1/4-inch standard TRS stereo jacks, so you can plug in mics or musical instruments. (In an effort not to offend our readers, I will not share my electric guitar test performance online for review.) Another 3.5mm input TRRS works as a sub audio source for background music or as a third mic input. The fourth input, a USB-C port, provides the connection to your computer for recording, but can simultaneously deliver audio for your program, if needed. Two headphone jacks with individually adjustable monitoring levels make it easy for host and guest to hear the show as it’s produced.
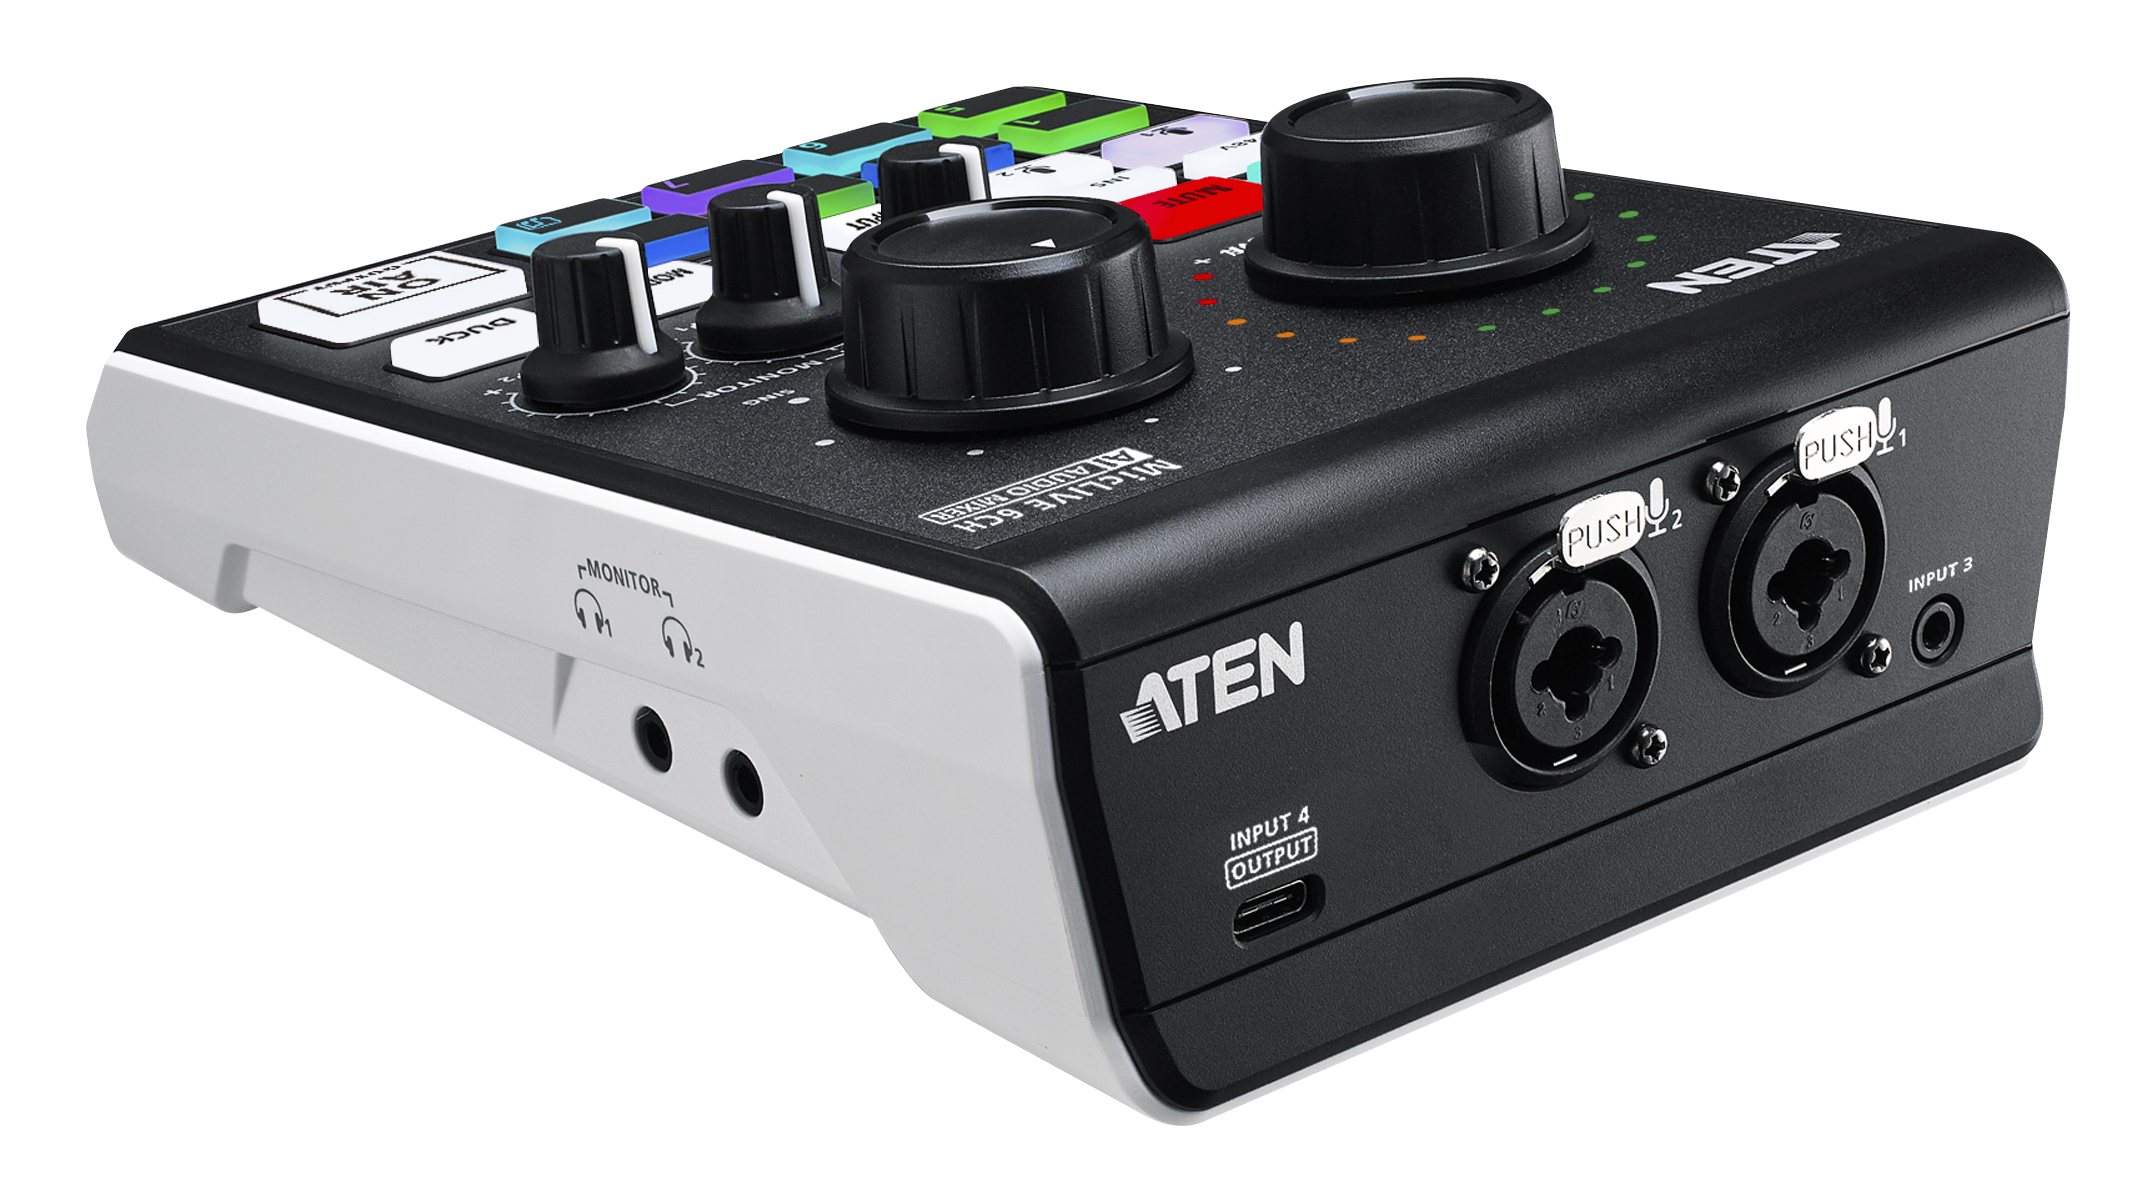
Packaged in a sturdy plastic housing that’s about 2.5 inches deep, MicLIVE only weighs about a pound and delivers 24-bit/96kHz audio sampling. An oversized “on-air” button lights up in bright red when the mixer output is live. I’m probably just being greedy, but I would have liked a USB input option (or two) on the mixer as well, so I could put my podcasting mics to use.
Software Boost
For best results, you’ll need to download OnAir Audio, a free program designed specifically for MicLIVE. While the physical mixer is perfectly operational on its own, the software provides additional functionality. For example, the unit has one knob that is shared between all inputs; the green, yellow, and red LEDs surrounding it indicate your audio level. However, the GUI offers an expanded mixer layout, with each input assigned its own fader bar and mute button.
[USB Type-C: One Port to Rule Them All]
MicLIVE offers AI Smart EQ, which automatically calibrates EQ settings to compensate for your recording environment. If you plan to take your show on the road, AI Smart EQ can help minimize unflattering locations. You can also access EQ settings and more for each input manually through the GUI.
A daily selection of features, industry news, and analysis for AV/IT professionals. Sign up below.
When active, the auto ducking feature lowers the volume of inputs 3 and 4 when you start talking on inputs 1 or 2. It’s a nice feature if your background music is being fed through one of the sub audio inputs, so you don’t have to rush to fade out the music as you start talking.
On the mixer itself, there are eight effects buttons, which are used to playback stingers, bumpers, or jingles stored within MicLIVE. Recording new clips (up to 20 seconds each) is as simple as pressing a few buttons. On the mixer, buttons are numbered 1-7, with musical notes on the eighth button, but the GUI allows you to name each effect and add colors and icons. You can also adjust the playback volume and set your clip to loop through the GUI.
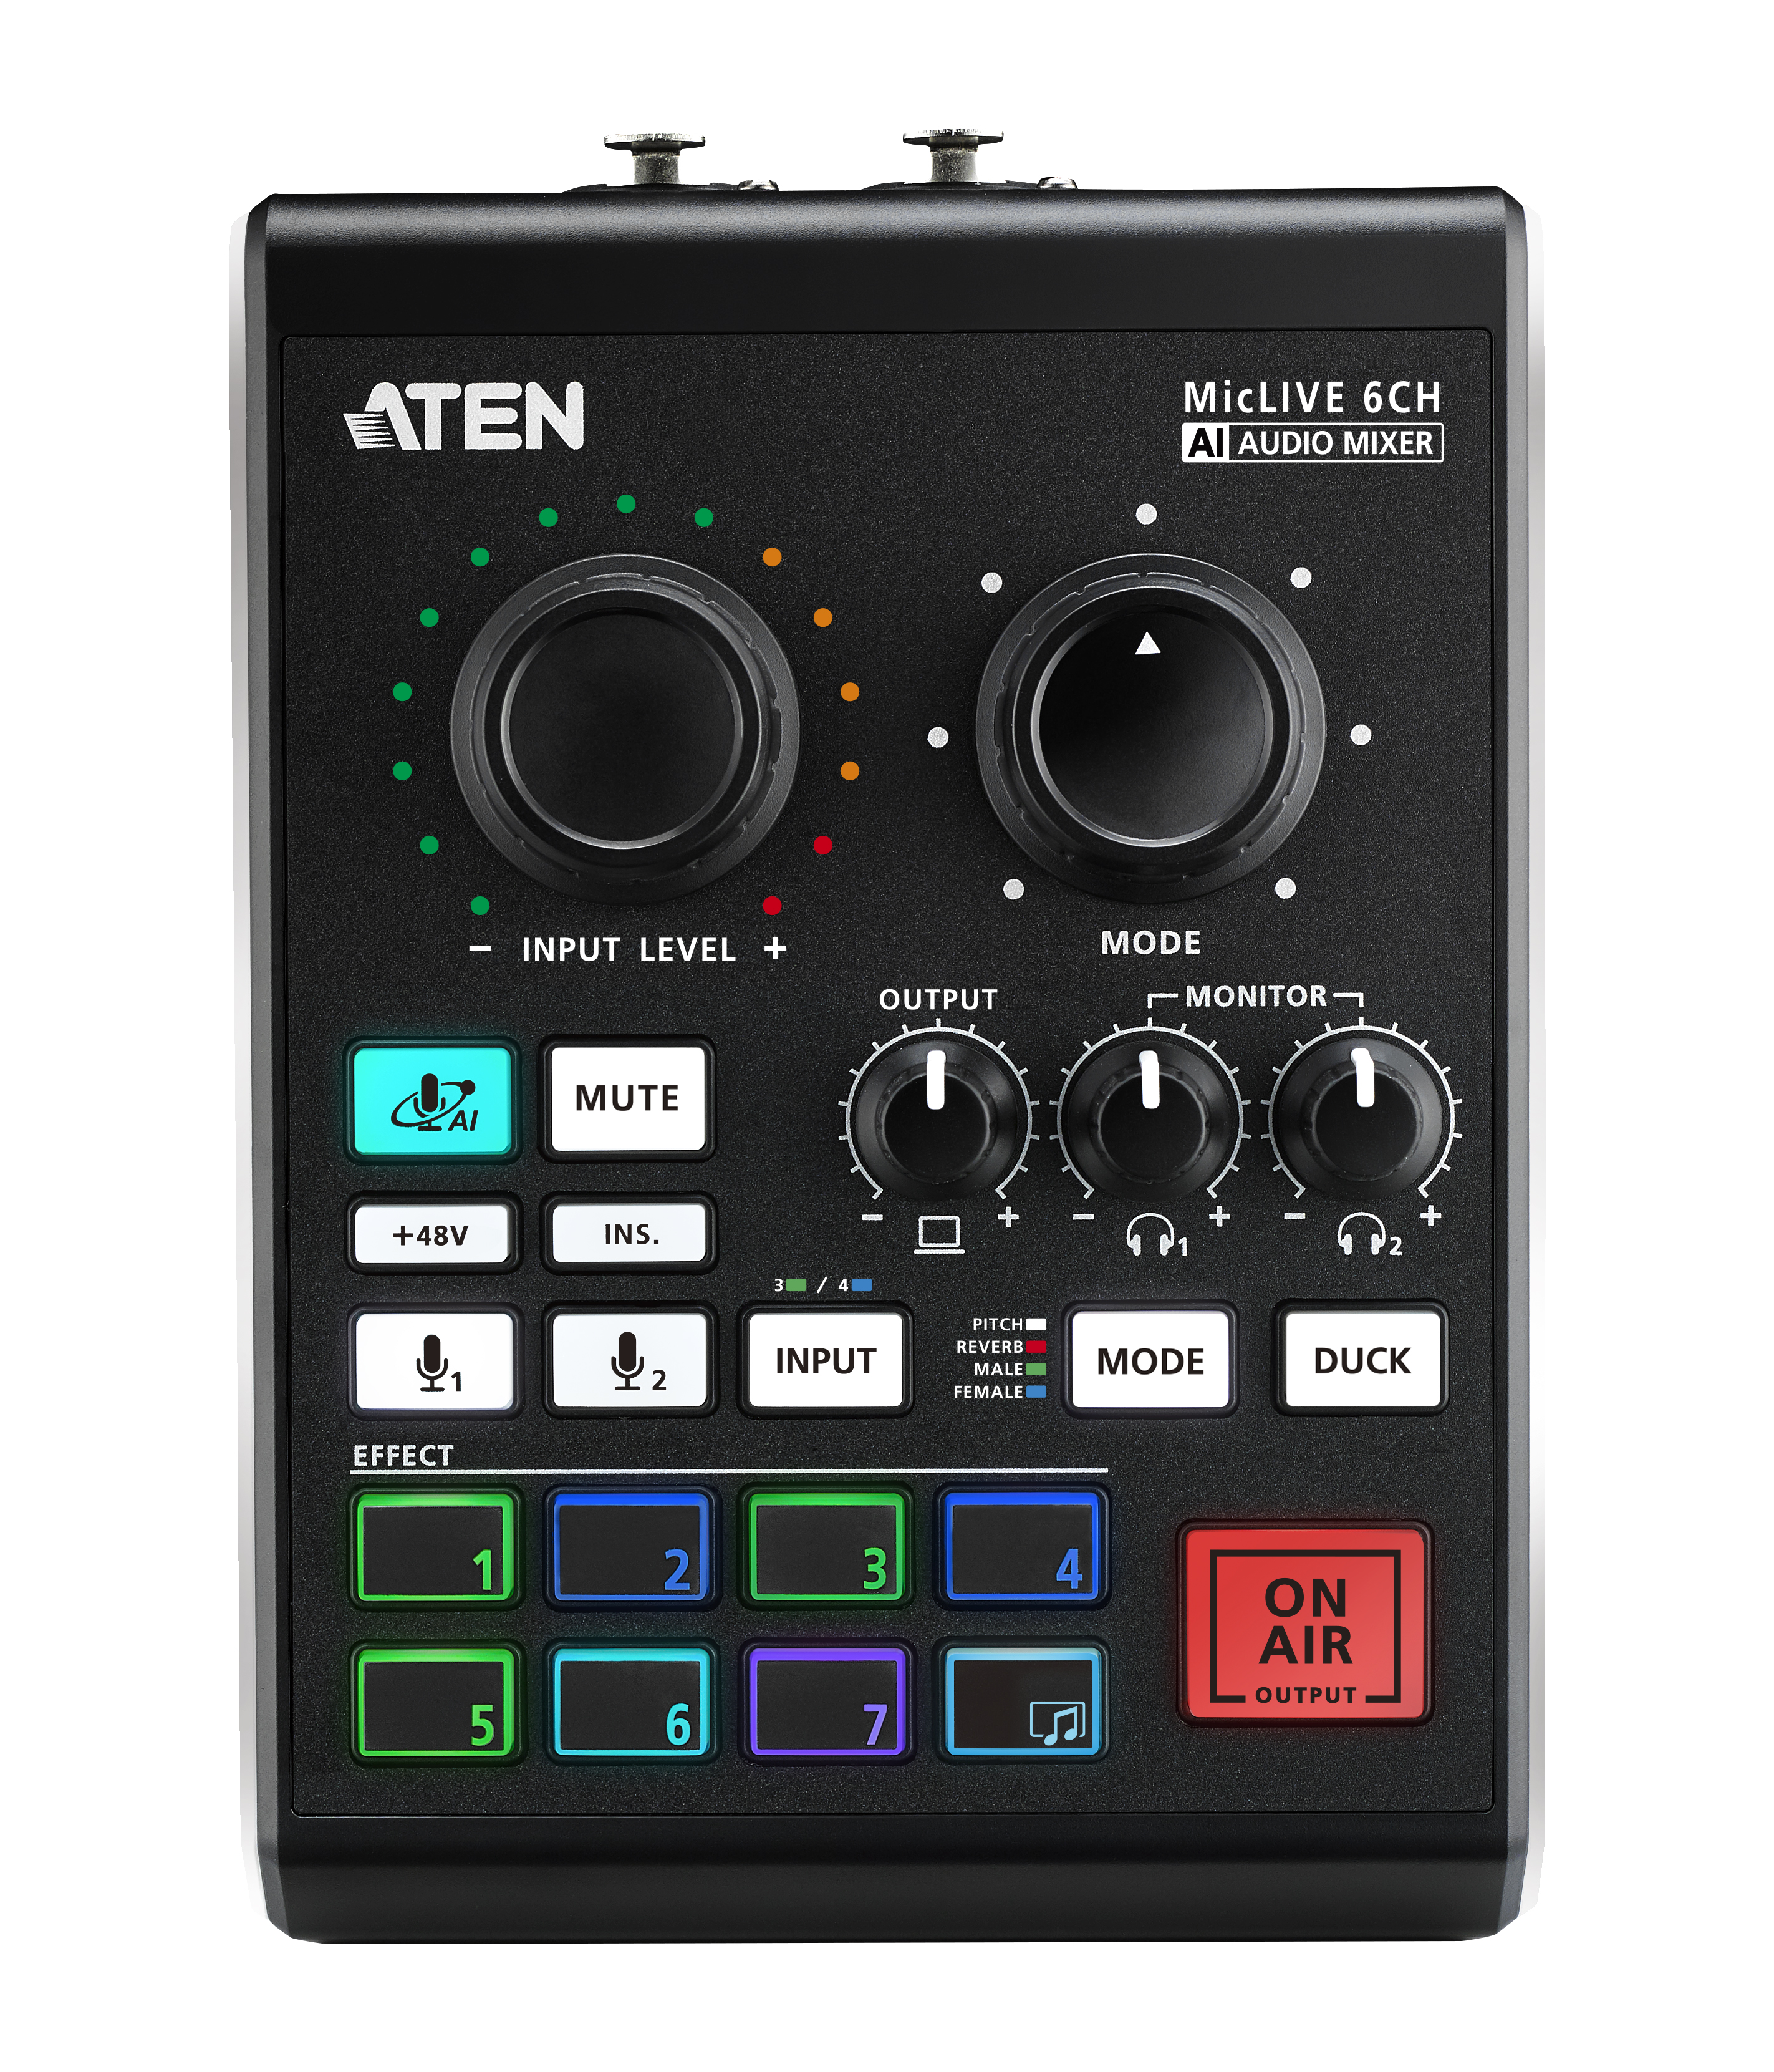
MicLIVE even includes four adjustable Voice FX settings, which are accessed from the mode button on the mixer (or mode menu on the GUI mixer). You can elevate your tone (pitch), add some echo (reverb), sound like you just inhaled helium (female), or imitate the singer from Yello’s hit song, “Oh Yeah” (male). These are all obvious digital effects, but they do offer some creativity for podcasts. Plus, you can create custom (read: more subtle) Voice FX presets from the OnAir Audio software and assign each preset with a custom color light on the mixer’s mode button for easy recall.
Priced at less than $300, MicLIVE is an affordable option for school media and music programs, though integrators will have to configure some sort of theft protection. It can also be a useful tool for companies or individuals looking to produce their own podcast interviews without spending a fortune on equipment. Though a recording option within the software would be a welcome addition, there are a lot of features packed into a very compact, portable package—and the option of physical mixer and/or GUI control will make MicLIVE appealing for a variety of setups.
Different Approaches
The Shure MV7 sent to me was part of a podcast kit with a Manfrotto PIXI tripod and two 10-foot USB cables. A true hybrid design, the back of the unit features XLR and USB ports (yes, you can use them simultaneously), plus a standard 3.5mm headphone jack. The MV7, which was announced in late 2020, also includes a form-fitting windscreen and adjustable yoke.
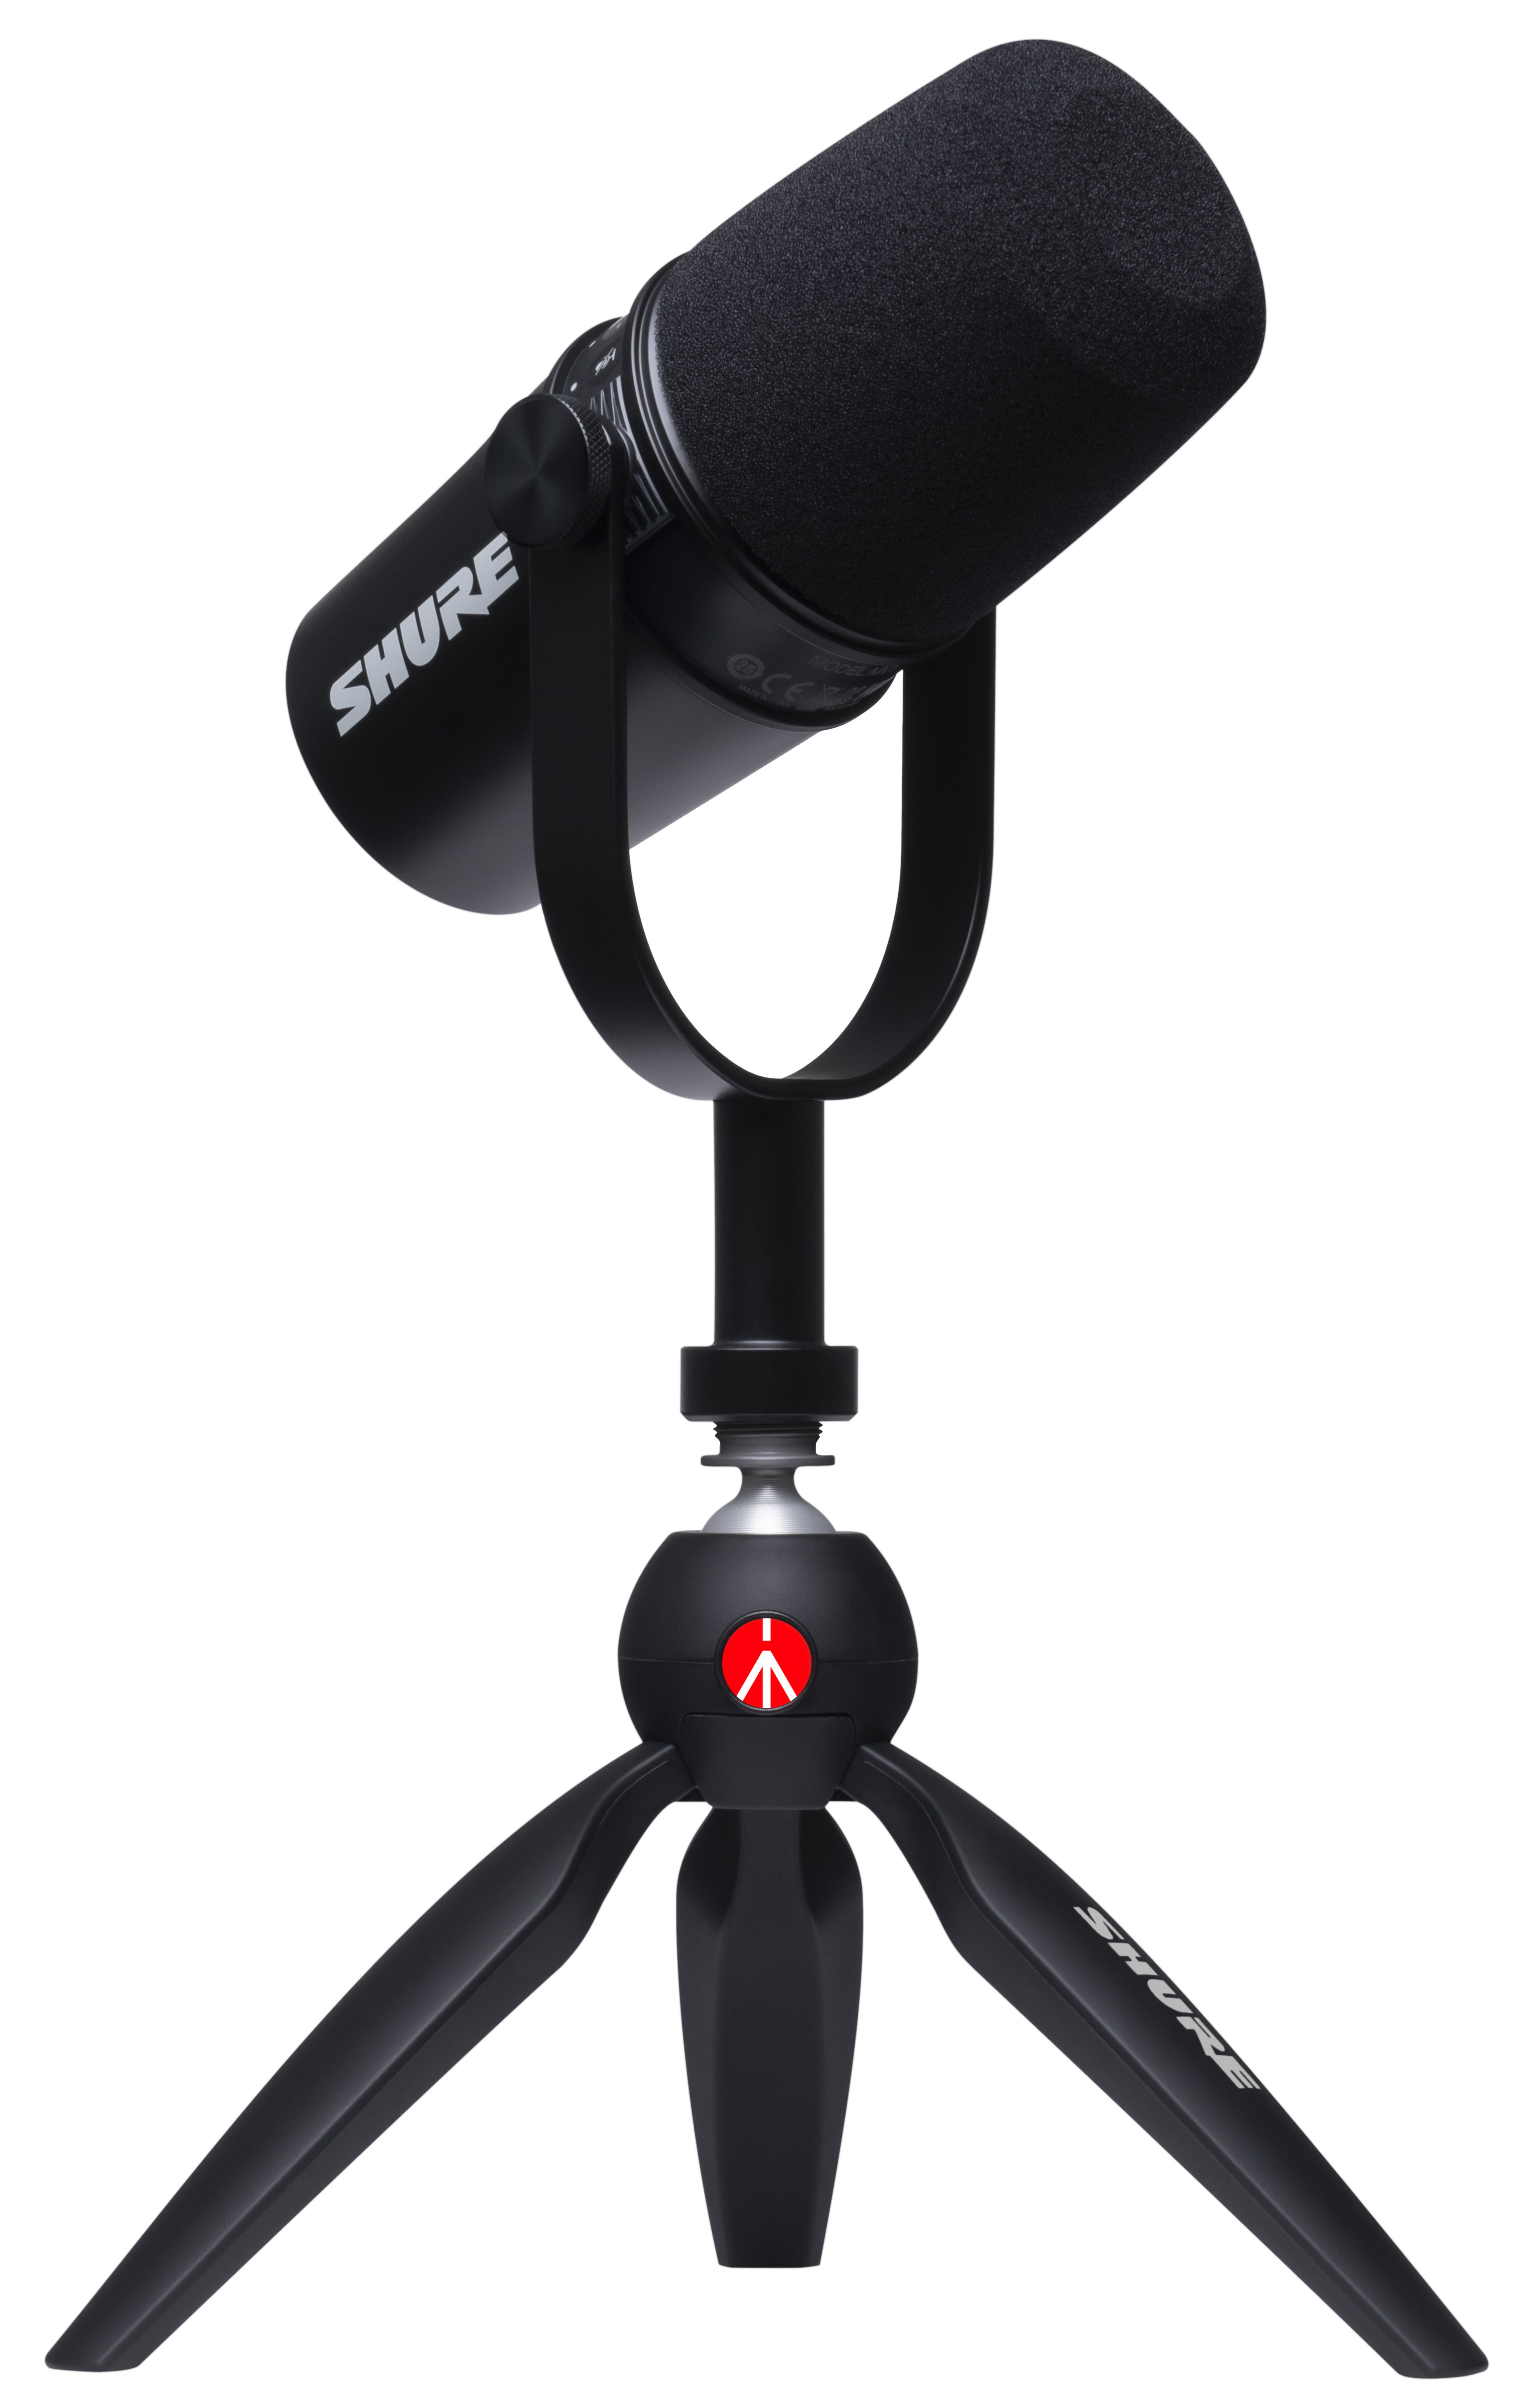
When the yoke is attached to the Manfrotto PIXI, the mic sits about 10 inches above your desk. You can adjust the angle of the mic using the yoke, but you can also change the angle of the yoke with the tripod’s locking mechanism. It’s a simple, sturdy tripod that works well if you don’t have a standard or boom mic stand.
[Review: JVC PTZ Streaming Cameras Deliver IP Production Versatility]
What makes the MV7 particularly interesting is its integrated touchpanel interface. From there you can adjust your mic gain (green LEDs) or headphone volume (orange LEDs). I’m not one for touching a mic during production (old habits die hard), but the touchpanel also includes a mute button that automatically kills the MV7. You can even lock the touchpanel once your levels are in place. I couldn’t see the interface well when I positioned my mic for recording, but I could glimpse enough of the LEDs so they served as an indicator that the mic was on and functioning.
Note, all that functionality goes away when you use the XLR input—the touchpanel only works via the USB connection.
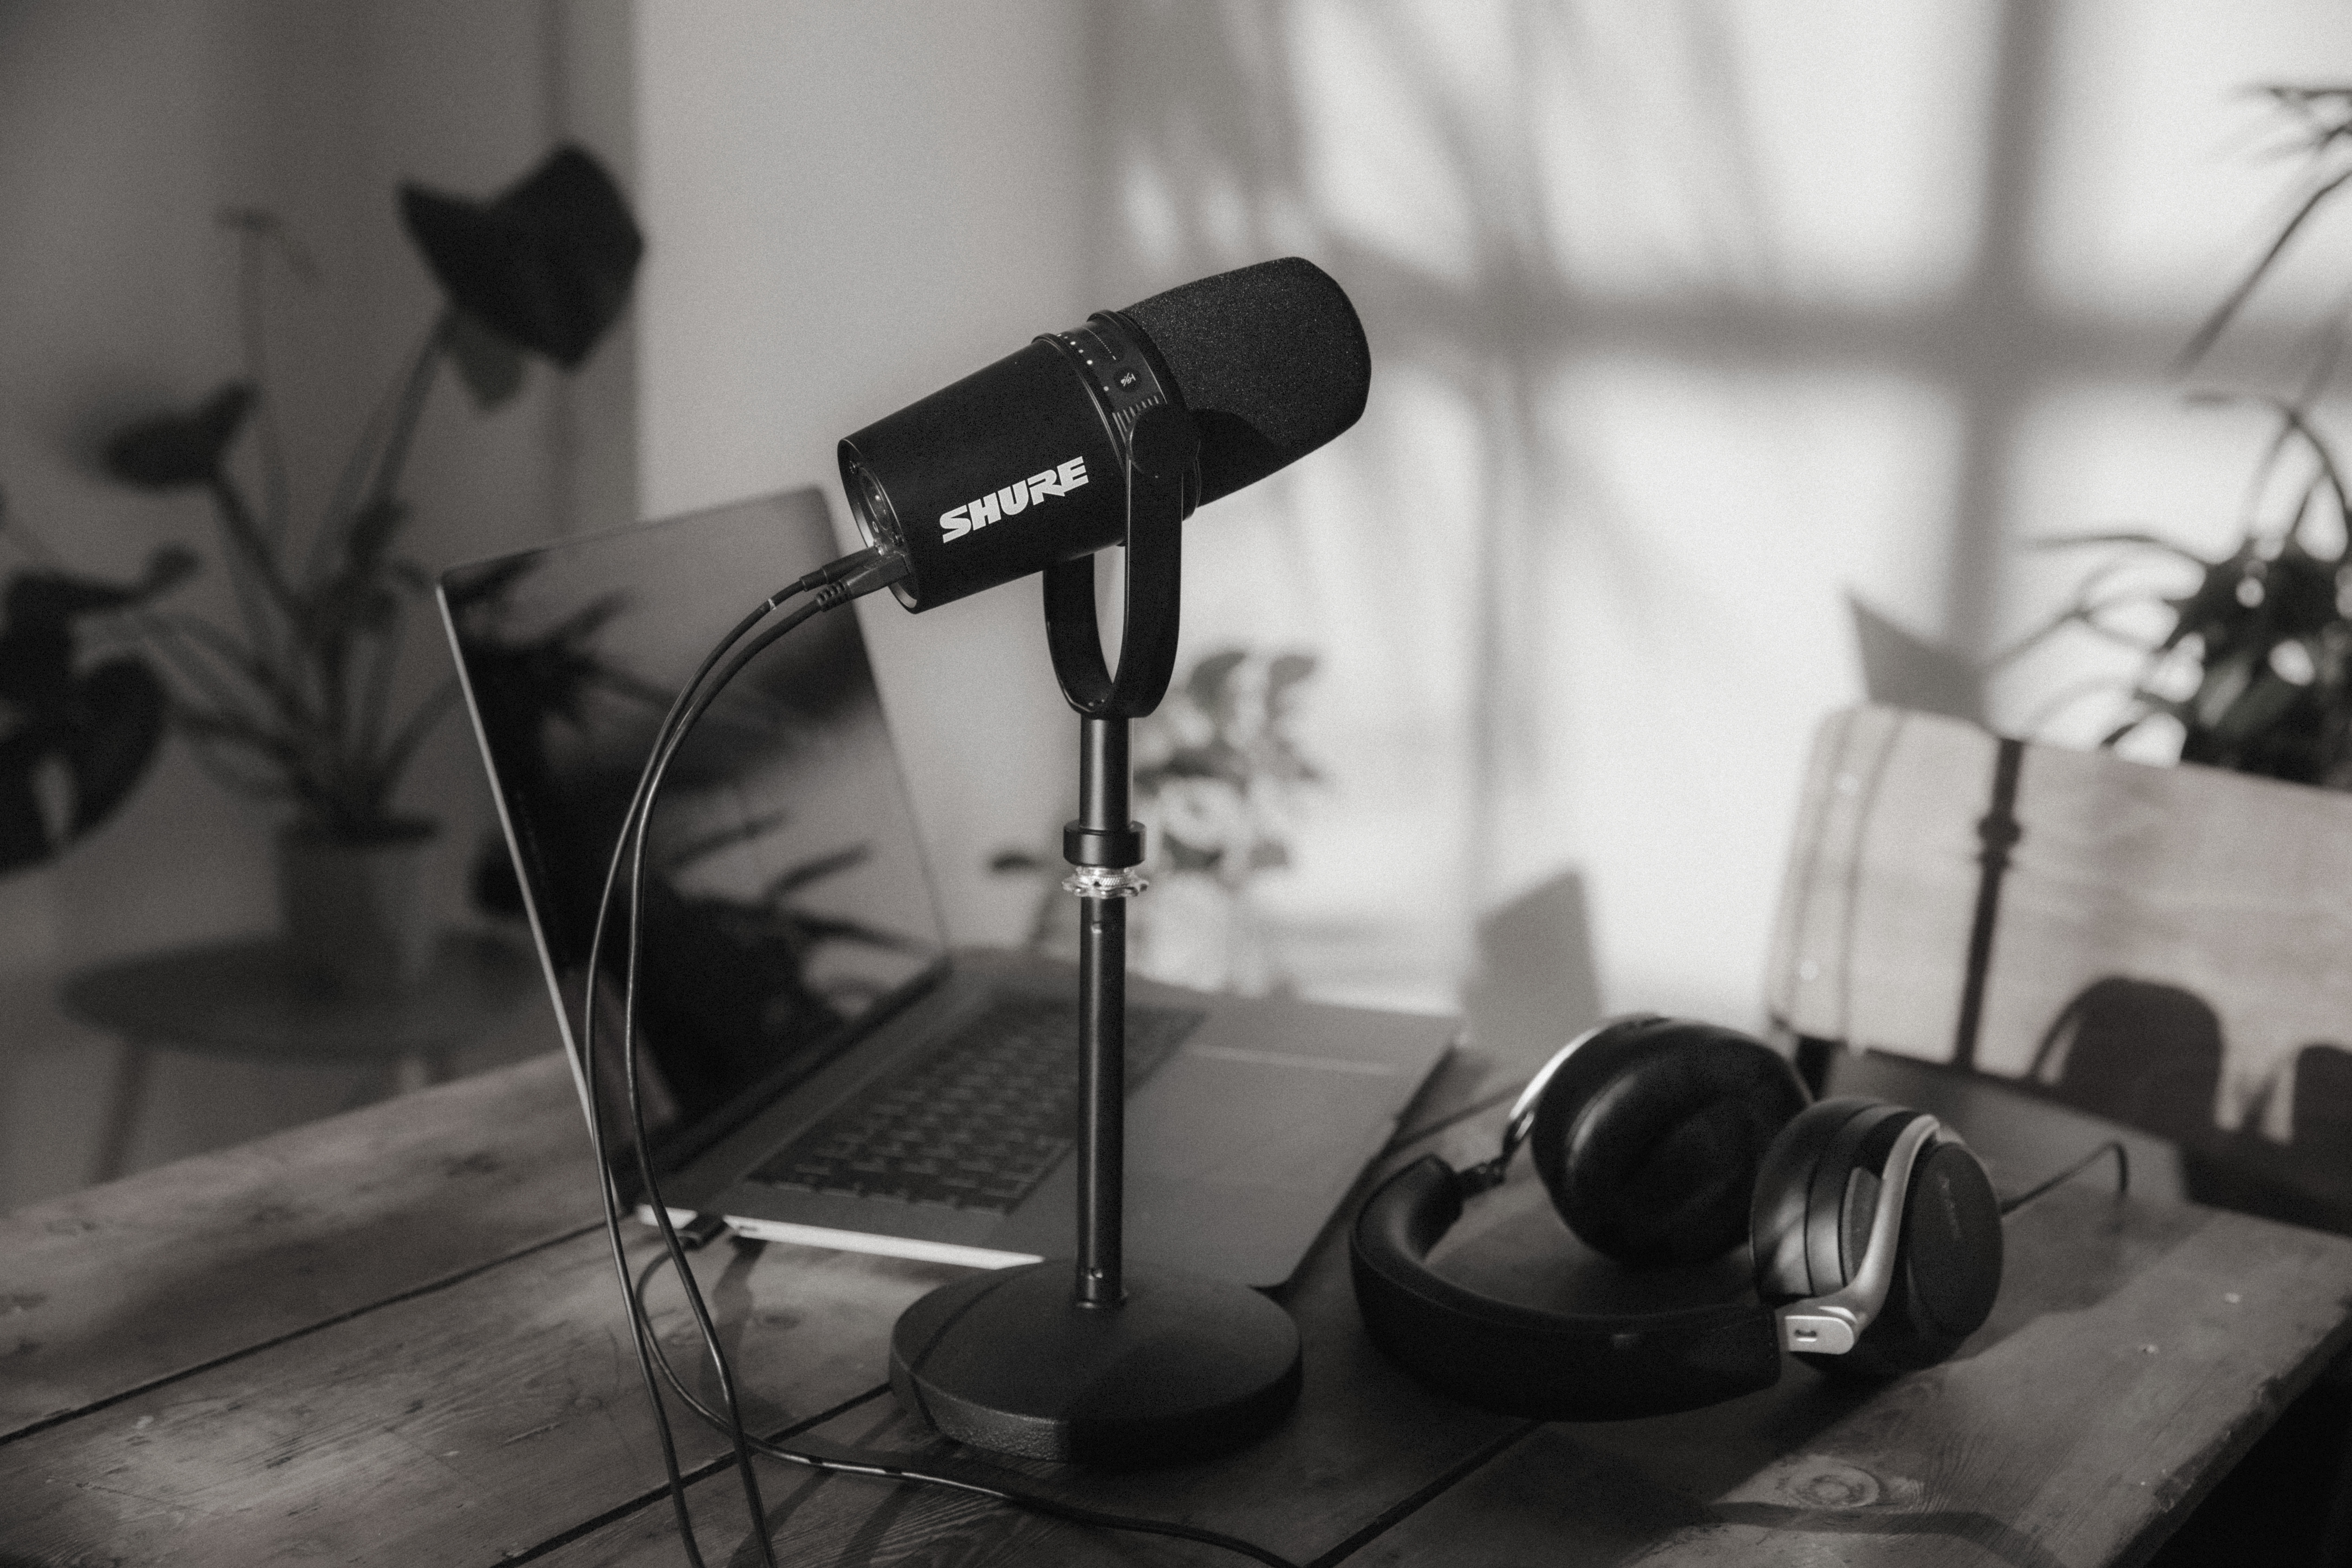
For maximum control, your MV7 requires a free software download of the ShurePlus MOTIV app for your laptop, phone, or tablet. From there, you can create custom user presets, change filters and EQ to better suit your voice, adjust recording levels, or just set the auto level mode and let the microphone figure out your gain and compression settings. You can also record to your phone or tablet.
You can’t change the cardioid pickup pattern, but there is a setting to adjust the mic based on its distance from the speaker. In my office—ahem, podcast recording studio—the mic stays “near” (about 1-6 inches away), but a “far” auto level adjusts the mic for talent that is 6-18 inches away without the annoying gain hiss you’d expect.
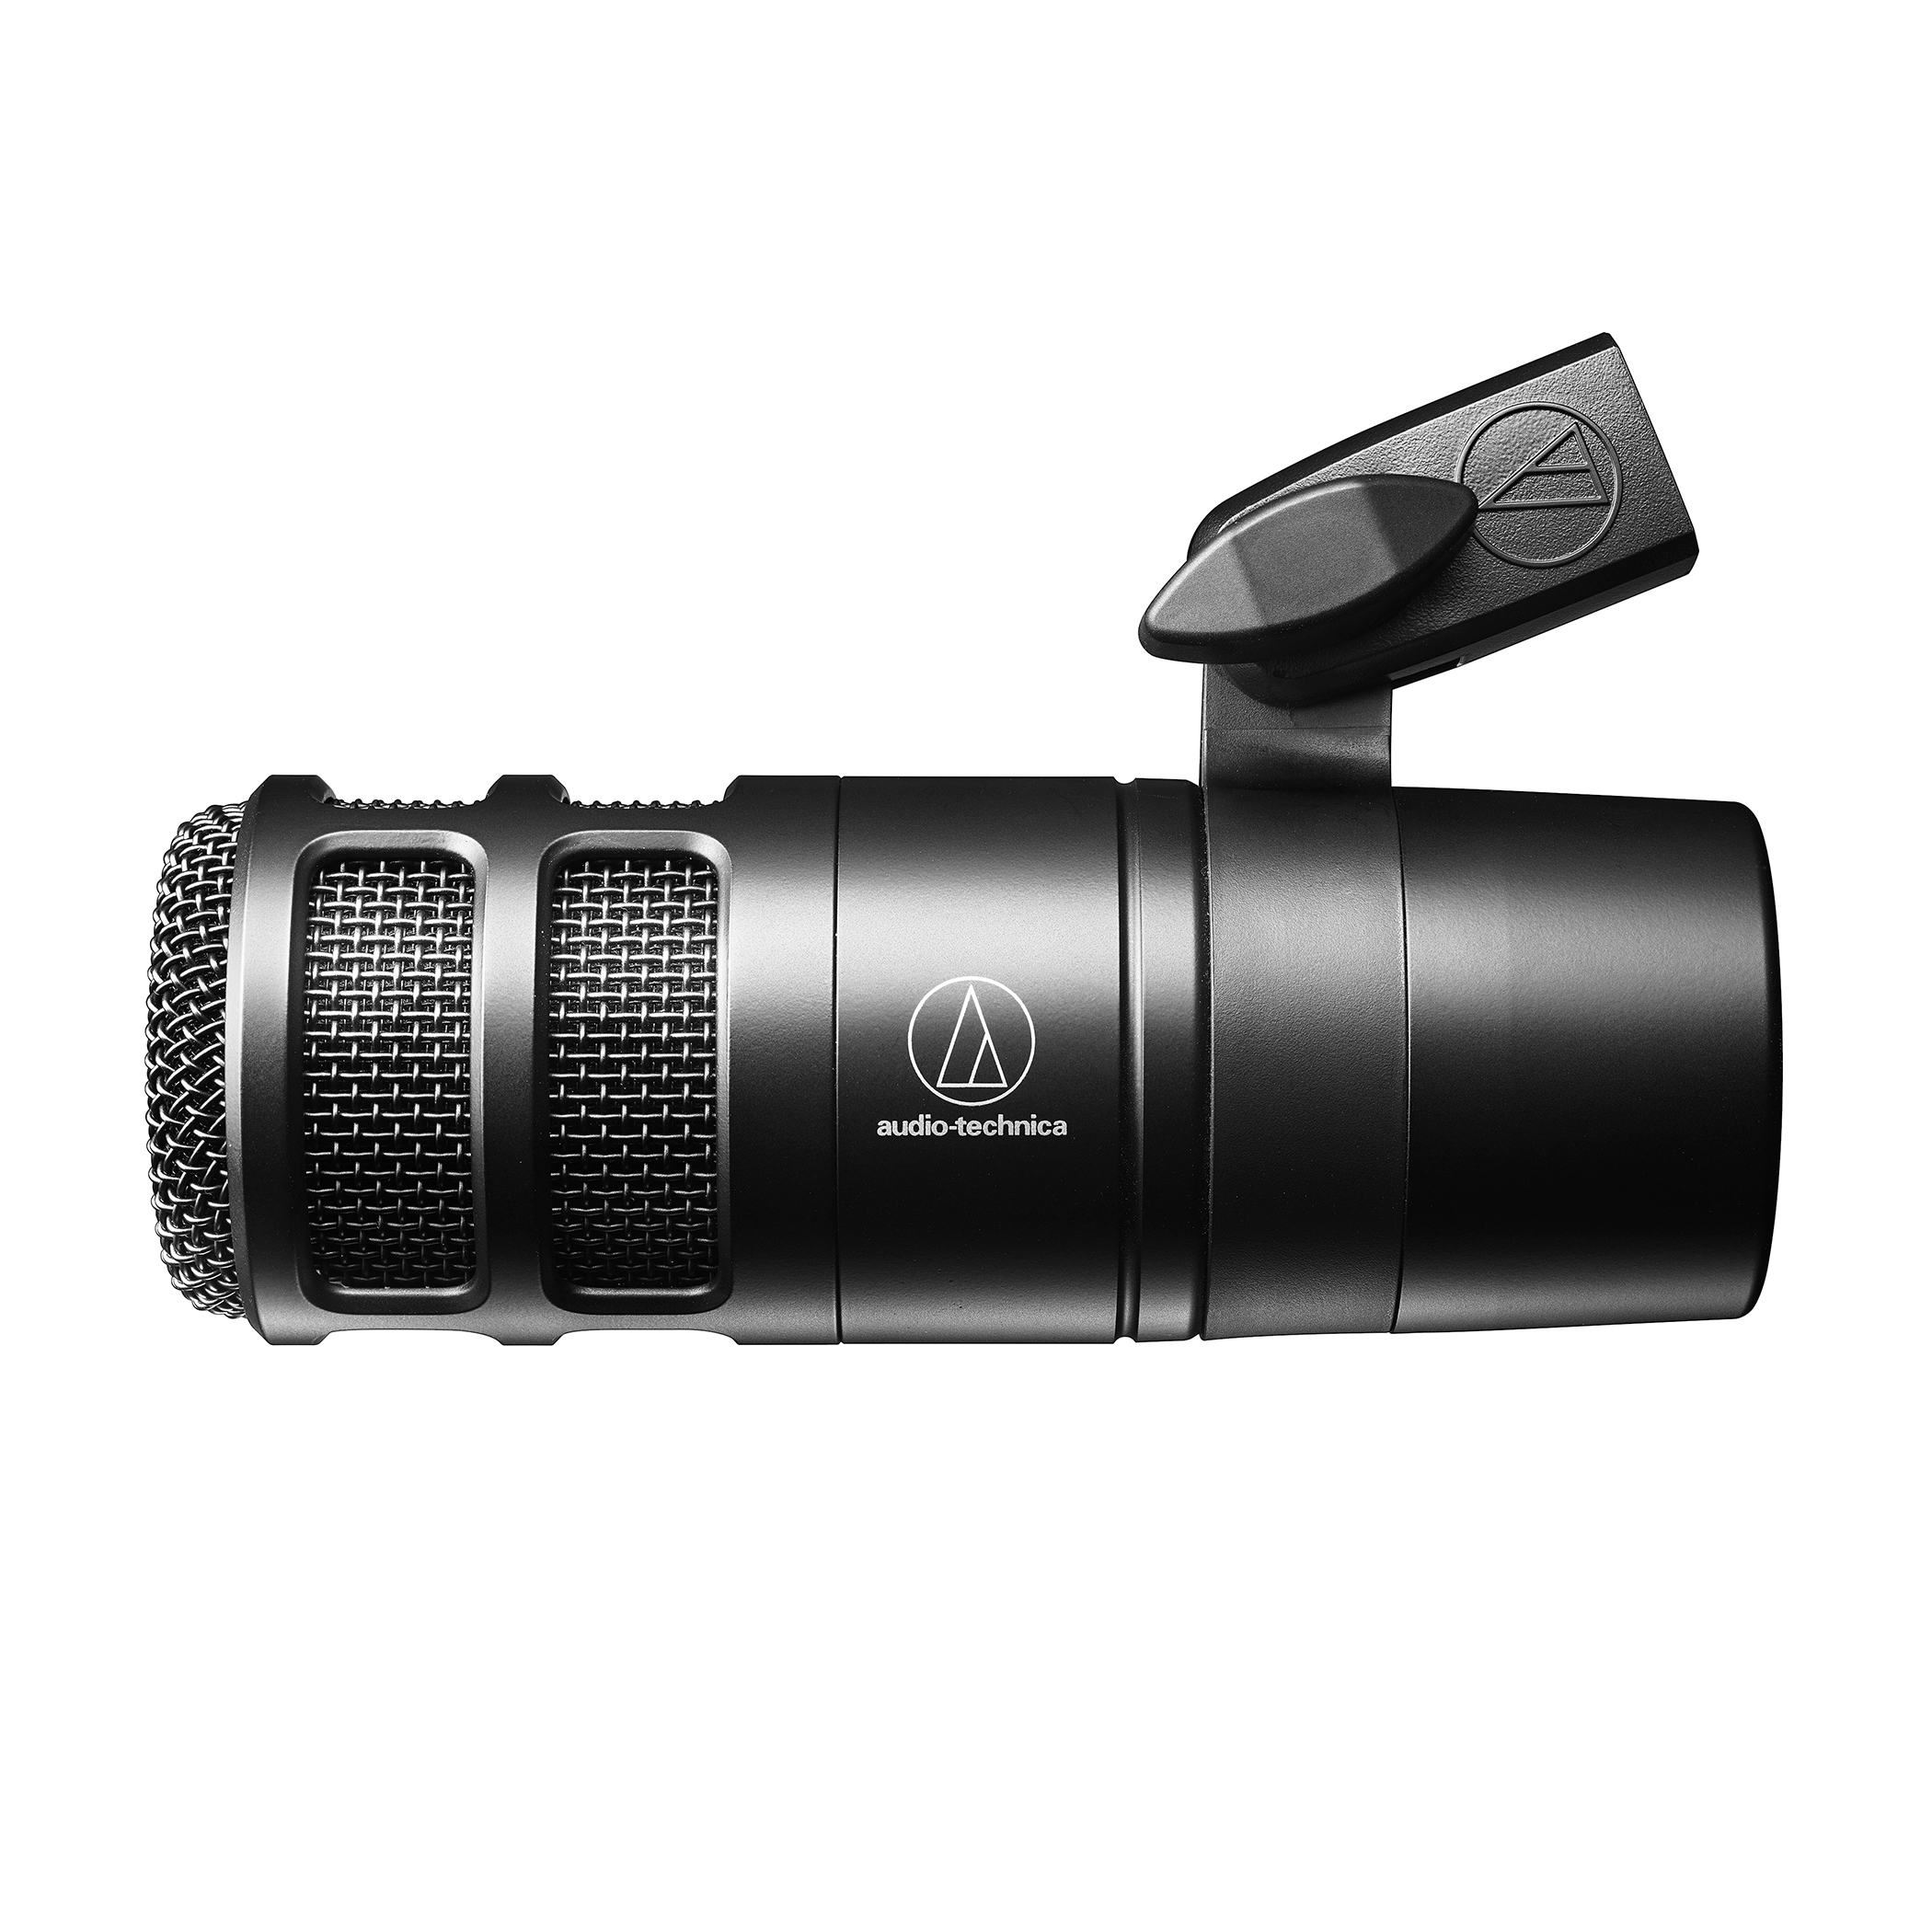
Introduced last year, the AT2040 is a more straightforward broadcast mic with an internal, multi-stage windscreen to keep pops to a minimum. Instead of a yoke, it has an integrated shock mount to minimize noise from your mic stand or boom. There are also no integrated LEDs—if it’s plugged in, it’s on. The AT2040 has a hypercardioid polar pattern, so it’s very focused on what’s in front of it. An Audio-Technica padded storage pouch is included.
Both are dynamic mics designed to minimize room noise, and neither requires phantom power. Featuring all-metal construction, both mics also have a solid build quality. Compared to the AT2040, the MV7 looks a little chunky—and oddly back heavy when you take off the windscreen—but it does feature the integrated touchpanel.
Test Drives
I read part of one of my recent editorials to test both microphones. My voiceovers were recorded in Audacity and exported as MP3s. Both VOs were recorded with the air conditioning working hard in the background to minimize the South Florida summer heat.
Something to consider: I use a compact microphone isolation shield when I record audio projects. It works very well with my side address USB microphones—but not with the MV7 or AT2040, because neither one sits upright. You’ll have to find another solution for sound absorption, though the mics performed very well without it.
[Review: 5 Things to Know about the Jabra PanaCast 20]
Not surprisingly, both microphones delivered high-quality audio reproduction. Comparing the XLR-based recordings from both through my beyerdynamic DT 770 headphones, the AT2040 was a touch warmer, but it had less success avoiding pops.
Which is the best mic for you? It really depends on your budget and your needs, as the two microphones have some significant differences.
Priced at $219 on the Shure website (without the podcast kit), the MV7 has more connectivity options and additional software-based features (frequency response 50-16,000 Hz). You can even customize the colors of your MV7 (for an additional fee) through Colorware. If you want your mic to be a branding element, or if you’re looking for a mic to pull double duty for XLR and USB setups, there’s no denying the appeal here.
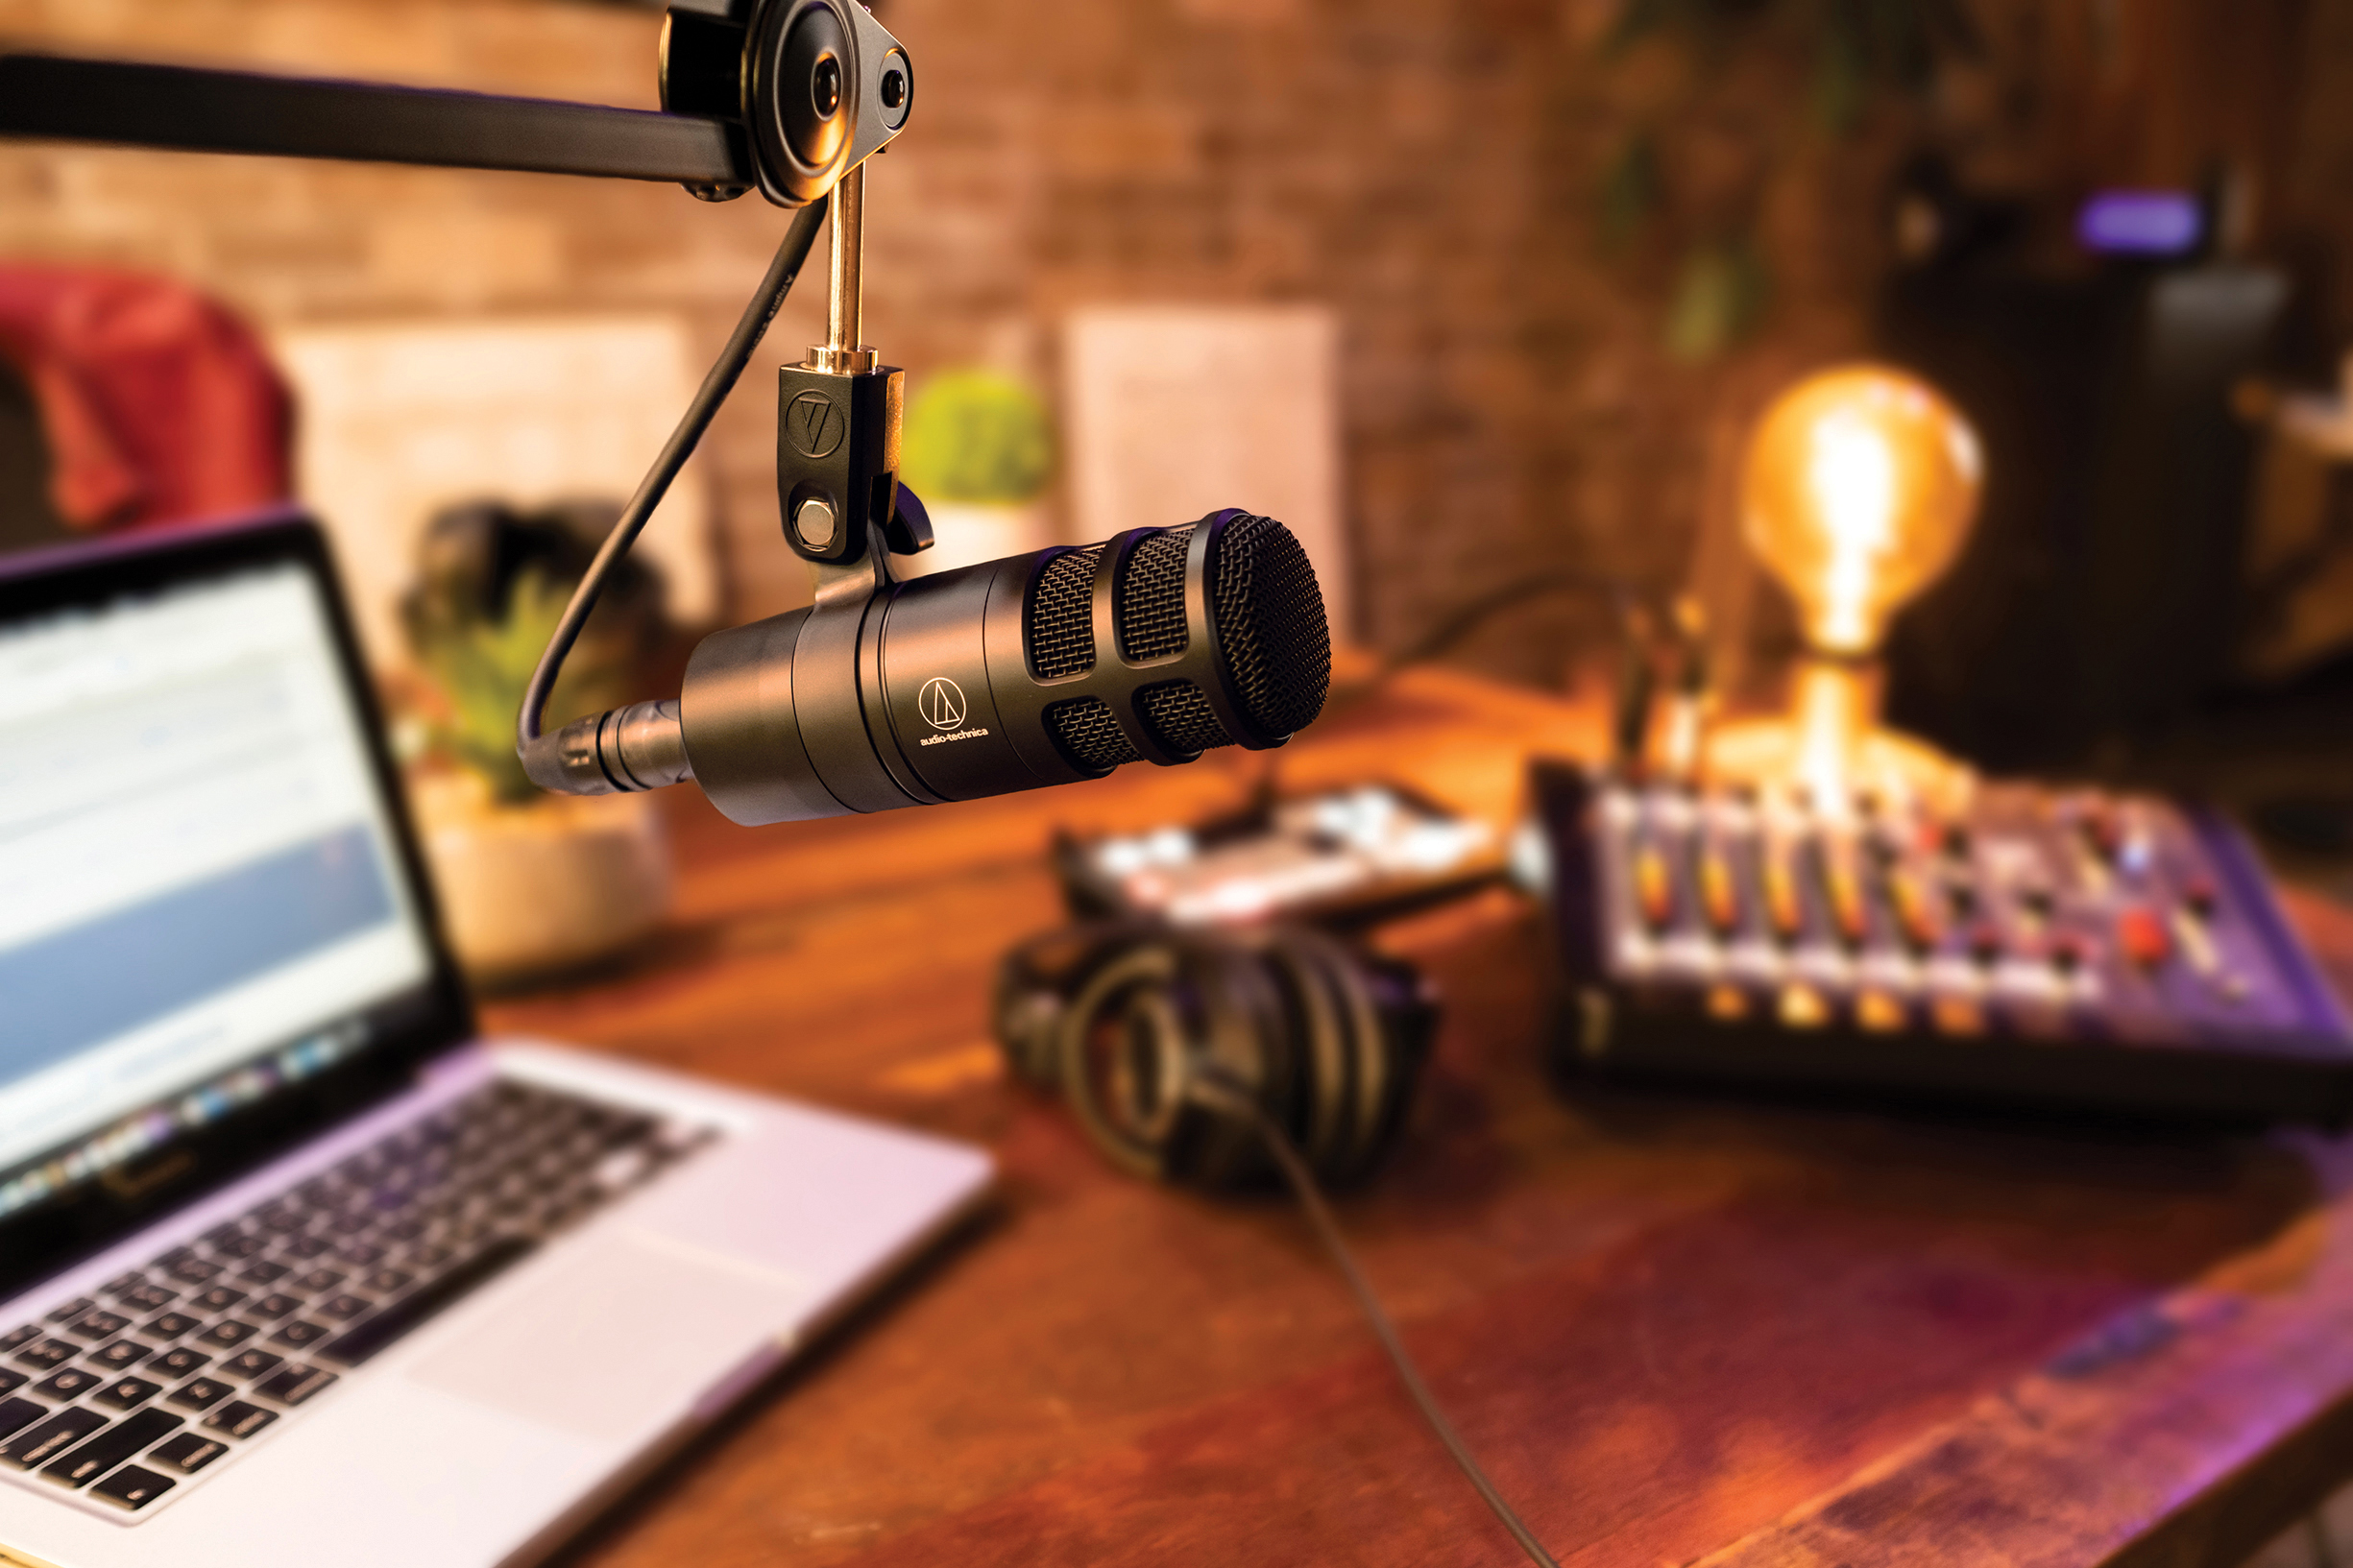
The AT2040 is less than half the price—$99 on Audio-Technica’s website—with a tighter pickup pattern and higher level of off-axis rejection, more streamlined appearance, and an internal windscreen (frequency response 80-16,000 Hz). However, you only get the XLR output and there is no companion software, so it’s up to you to add processing if you want it. Still, especially for schools or corporate environments, it’s hard to argue with a dynamic microphone that sounds this nice at this price.

Mark J. Pescatore, Ph.D., has been the content director of Systems Contractor News since 2021. During his career, he's hosted and programmed two ongoing regional industry trade shows (including Future B2B's AV/IT Summit), produced and hosted podcasts and webinars focused on the professional video marketplace, taught more than a dozen college communication courses, co-authored the book Working with HDV, and co-edited two editions of The Guide to Digital Television.
