Restoring the Spirit of Radio
A rediscovered reel-to-reel recording from 1976 gets digitized for the 21st century.
Have you ever played a record from the 1970s? If you took care of it, it probably sounds as good today as it did back then. How about a cassette or 8-track tape from the same time? If the tape hasn’t broken, you’ll notice that the highs aren’t as crisp, and it probably doesn’t sound like you remembered. But just like a record, every time you play this media, the quality diminishes slightly. Nothing lasts forever, especially media.
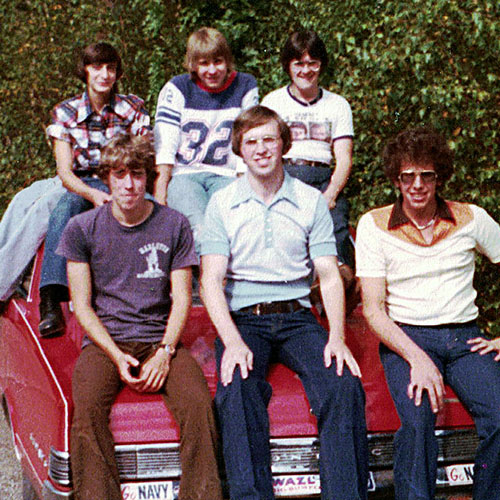
On June 10, 1976, Hazleton High School Retro Rap aired its last 90-minute program. As a high school senior just one week from graduation, I was one of four on-air hosts who played top 40 music, interviewed personalities, and had contests on WAZL 1490 AM. The disc jockey, Matt Jeffries, allowed us to “run” the show while he acted as engineer.
The radio program was weekly, but there was something magical about the last show. I wish I had taken a photo of us in action in the studio, but my cellphone wouldn’t be invented for another 35 years or so.
Since this was my last show and I would be going to college in the fall, I recorded the program at home on reel-to-reel tape. Only having a 1,600-foot spool of Radio Shack concert tape, I tuned my Sylvania stereo to 1490 AM, threaded my Sony tape deck, set the speed to 3 3/4 inches per second (IPS), turned the selector lever to play, and pressed the left and right record buttons.
The tape deck was plugged into an AC port on the back of the Sylvania, and the Sylvania was plugged into a timer that was set for 6:58 p.m. and would stop at 8:35 p.m. When both the stereo and tape deck power switches were activated by the timer, I hoped we wouldn’t have a power failure before or during the recording.
When I got home that evening, the system was off and the take up reel was full. I rewound the tape and spot checked it—everything was there. I labeled the cardboard box, inserted the reel of tape, and put it in my bedroom closet.
Saved from Storage
Forty-one years later, as I was preparing to sell my parents’ house, I came across the tape in the closet. I put it in a "save" box and brought it home. Six years later, I get a call from one of the other radio show hosts asking if I would be attending our 48th high school reunion. He then asked if I still had the tape of the show and could I bring it to the reunion. Knowing I would have to transfer it to another medium (CD), I said I would investigate the possibility.
A daily selection of the top stories for AV integrators, resellers and consultants. Sign up below.
Luckily, I’m into vintage equipment and have a few reel-to-reel recorders at my disposal (my wife says six too many). As all vintage tape players sit, even in semi-controlled environments, the rubber drive belts tend to decompose and turn into a sticky mess. This was the case with my TEAC X-3. Its drive belt was difficult to remove even with alcohol.
You always hear horror stories about people who open reel-to-reel tapes and find that the oxide has been shedding, the tape is curling or needs to be baked because the binder is coming off, or there's a strong smell of vinegar. Luckily for the Hazleton High School Retro Rap, none of these things had occurred.
With a new belt installed, I threaded the tape onto the recorder and played it back. My plan was to get a digital version using my Zoom H4n Pro recorder. I didn't want to play the tape too long and have it clog up the heads with oxide. I just wanted to make sure that the tape would hold up so I could get an audio level on the H4n and see if time had been a friend to my vintage recording. The Beatles master tapes were older, but to be fair, they probably weren’t stored in a bedroom closet.
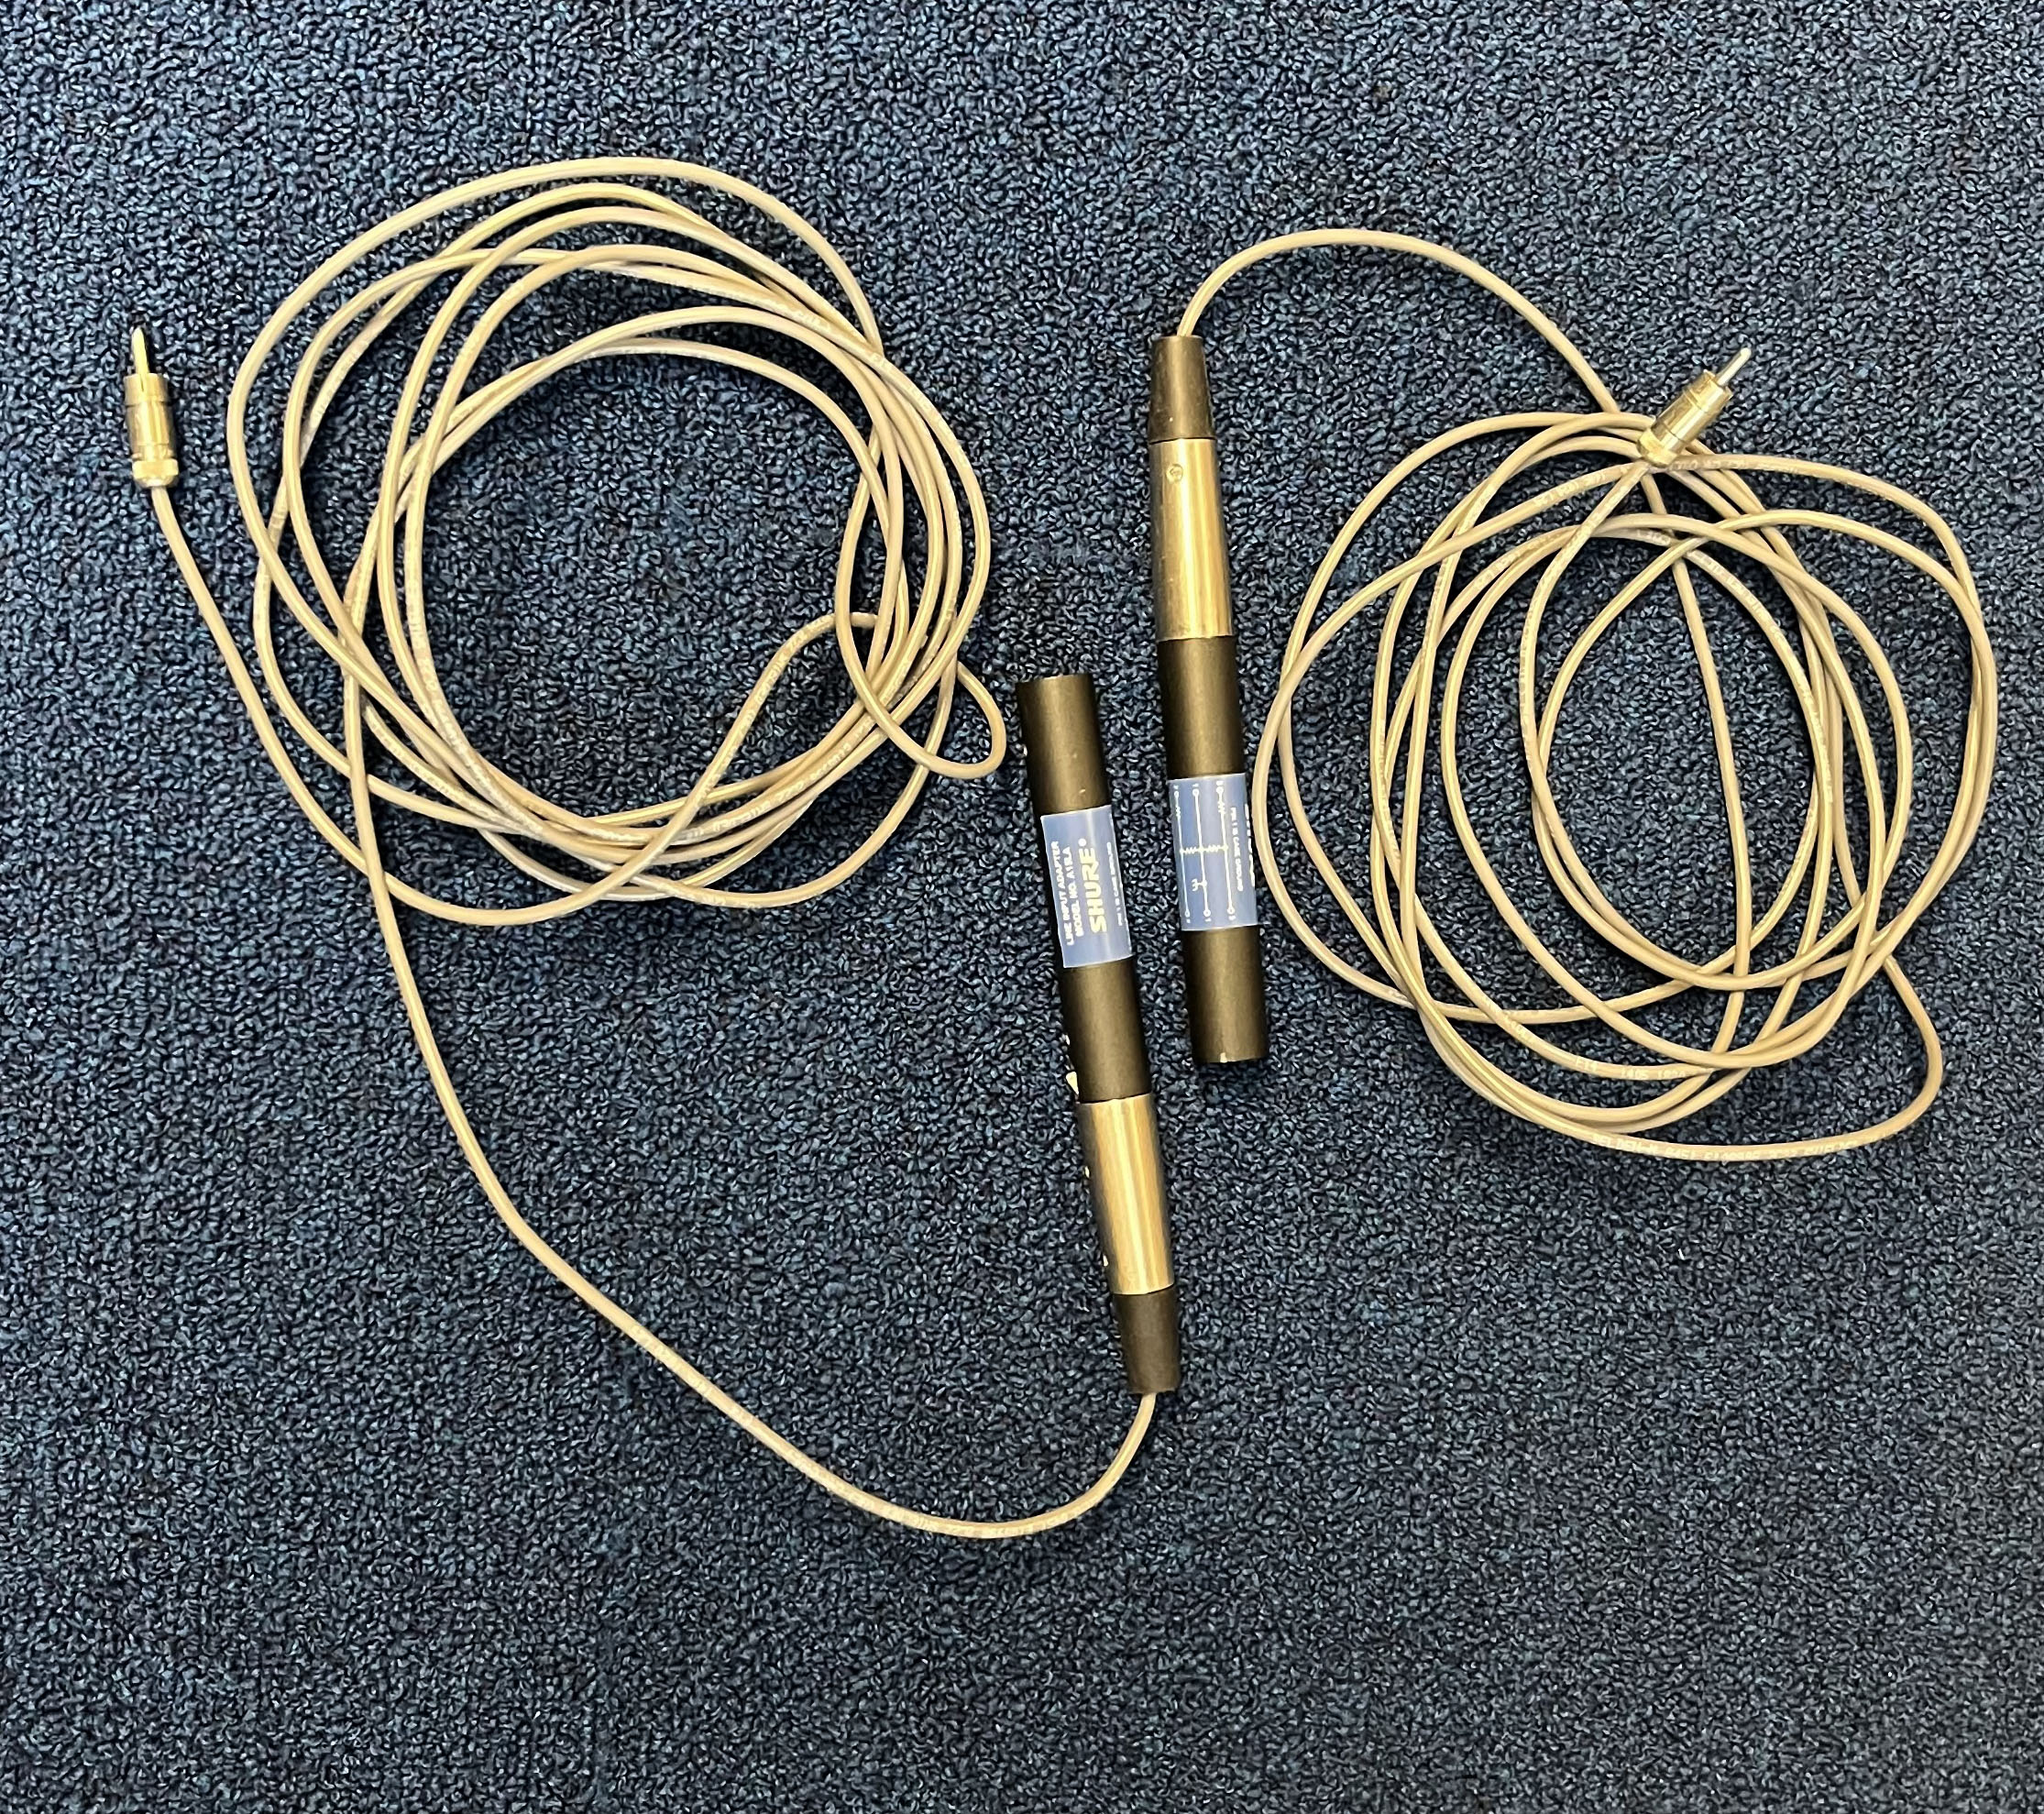
I needed to get the signal from out of the back of the TEAC and into the Zoom. Wanting to convert the TEAC’s RCA outputs to XLR inputs for the H4n, I created two RCA male to XLR male cables. Those XLR males attached to female-to-female Shure A15LA line adapters, and other XLR-to-XLR cables connected to the left and right inputs of the H4N Pro. It wasn't pretty, but these two line adapters were necessary.
When checking the audio levels, I was disappointed in the original audio’s quality. There was an extreme loss in fidelity. The highs seemed to have disappeared—it didn't have the presence that I remembered from the past, and something was lacking in the quality of the original recording. I had just cleaned the heads on the TEAC, and oxide wasn’t clogging them, but it was as if we were speaking through a stocking. I hoped I could correct it in post.
The most important thing was to get the program from the reel-to-reel tape onto a more modern digital format, so that any changes and or manipulations could happen. I set the H4N Pro to capture a WAV file rather than an MP3 (too much compression). Again, to save wear and tear on the tape and the TEAC’s heads, I set the playback speed to 7 1/2 inches per second, which would essentially play the 90-minute program in 45 minutes.
When completed, I removed the SD card from the H4N Pro recorder and downloaded the file to my MacBook Pro’s internal hard drive. I then turned to Adobe Premiere Pro software to get the audio file adjusted and cleaned up. Opening a new timeline, I dropped in the WAV file and changed the file’s speed on the timeline to 49%, which played back the original recording at the correct speed.
Back to the Future
Once I really listened to it for the first time in 48 years, it was time to go to work. To tweak the file so it sounded like I remembered it sounding, I added the following effects from Premiere. It was important to add these effects in this order, as the finished project would be the result of the specific layering of the various audio processing options.
The first effect was from the Amplitude and Compression heading under the Effects Bin. I went to Amplify and chose +10dB Boost under the preset. As the name implies, this brought up the level of the sound.
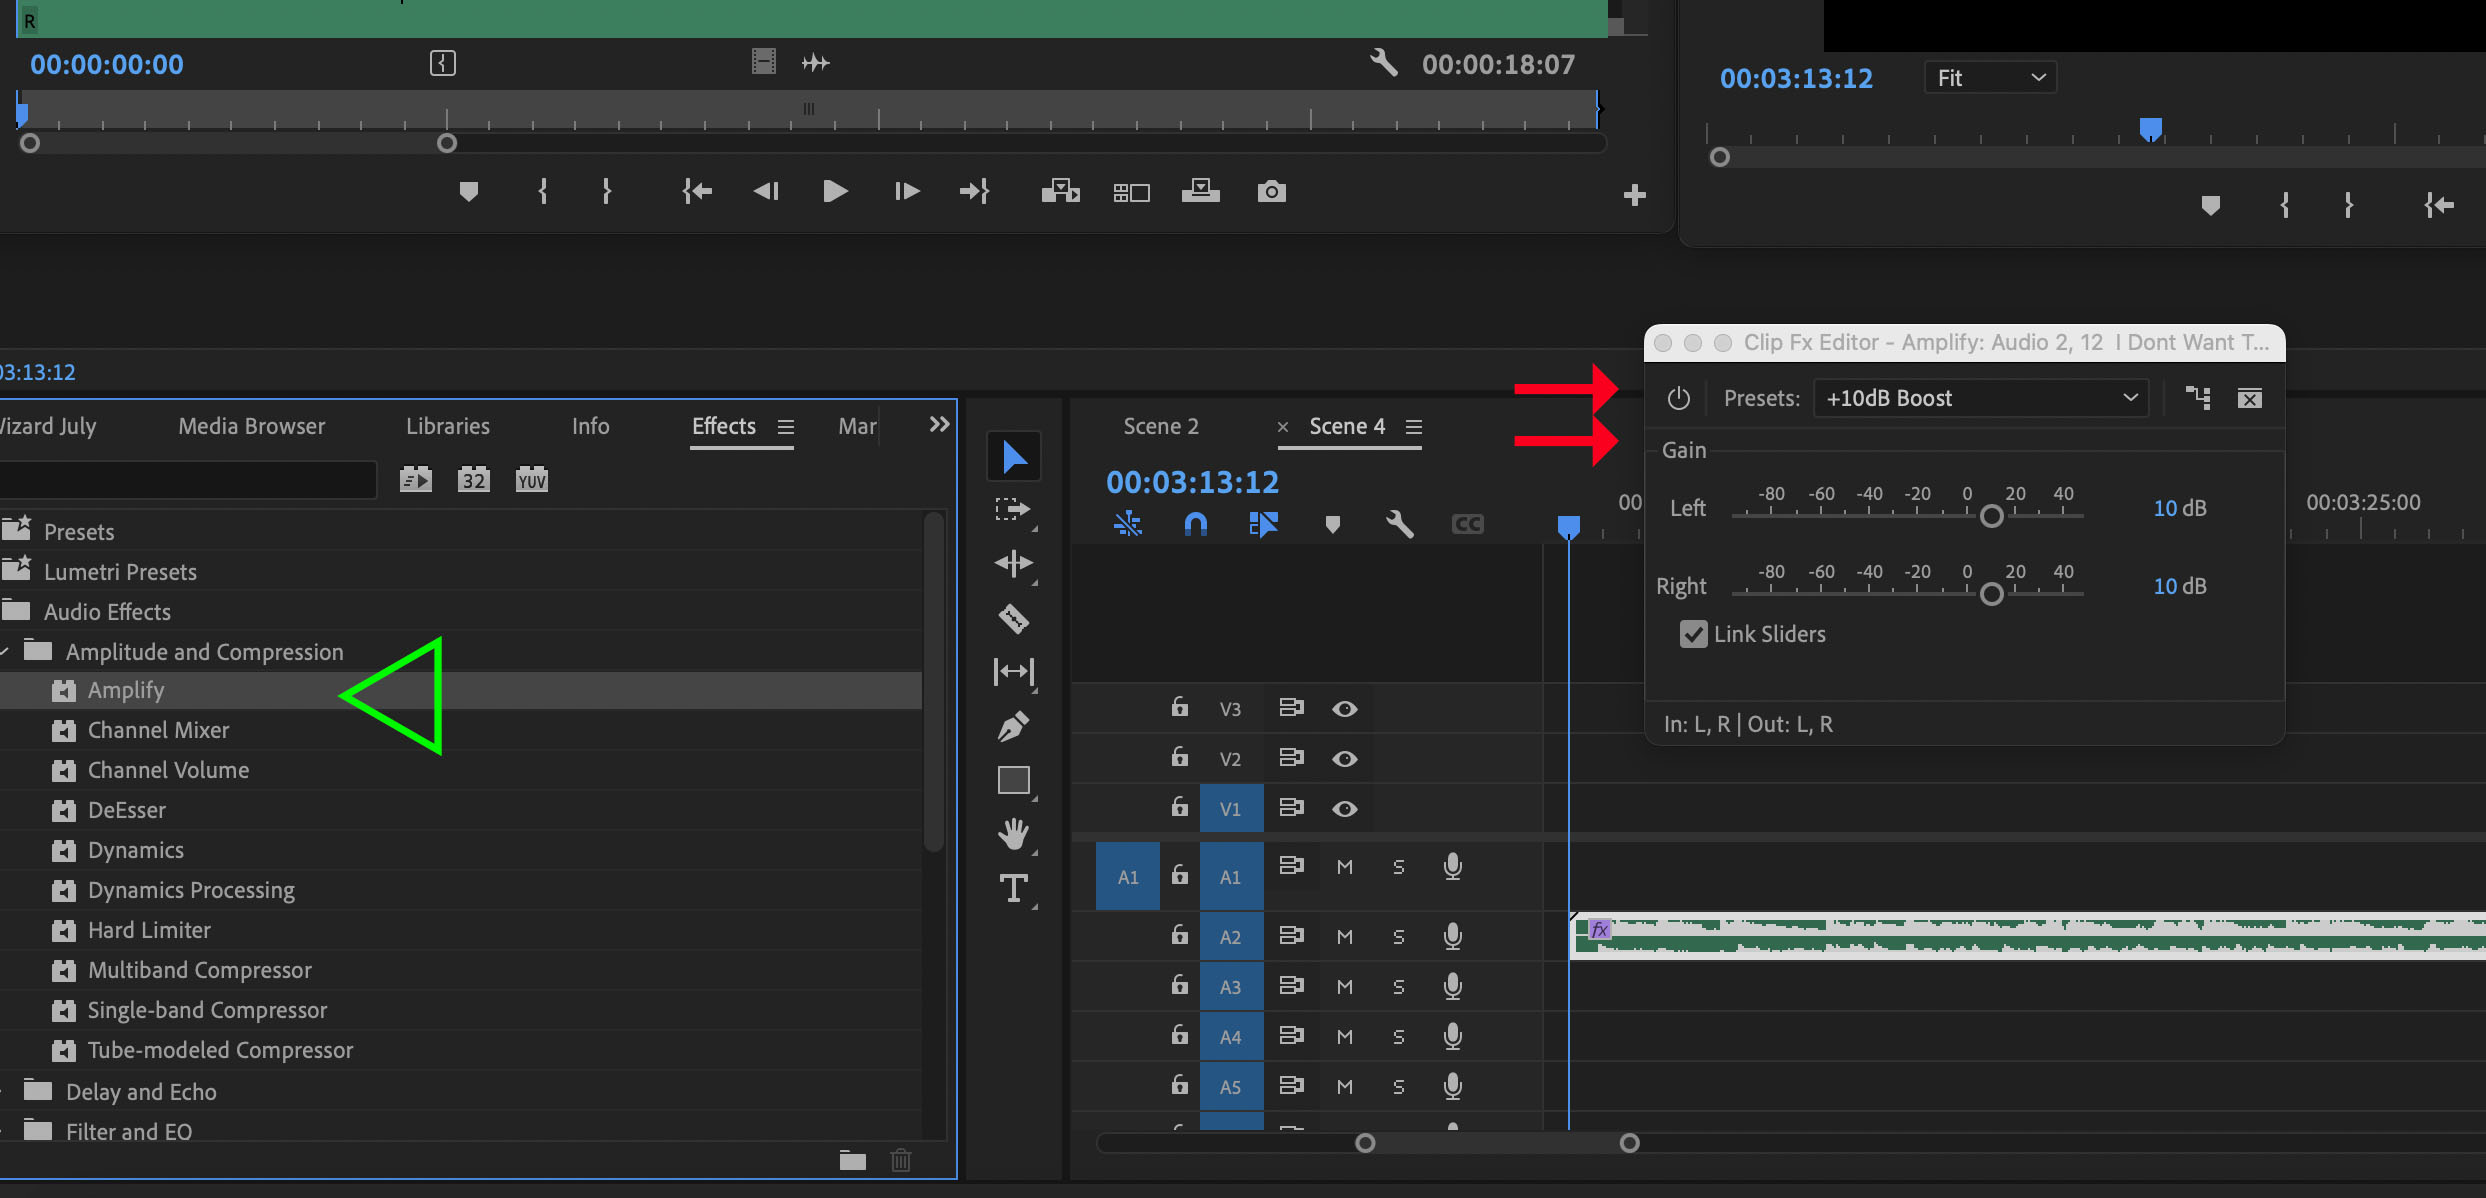
Back under Amplitude and Compression, the second effect was Tube-Modeled Compressor. I chose the Radio Leveler preset, because I was working with an older recording from tape and didn't want the sound of digital compression of modern audio. This preset added a warmer, vacuum-tube type sound. The individual slider levels can be adjusted to suit your tastes, but the defaults were very close to what I wanted.
The final effect, still in the Amplitude and Compression section, was the Hard Limiter. Within the preset, I selected Limit to -1dB. This doesn't add an awful lot that you can hear, so it isn't really required. To my ears, it adds just a little bit more to the sound quality.
There are some other things that you might want to deal with when working with an analog tape. One of them is hiss. I could have tried to remove some of that hiss, but trying to reduce that noise will affect the entire element.
Think of it as sort of like crowd noise. You don't want to adjust that too much because something will sound strange with the recording. I left the hiss where it was. Remember, this was the 1970s—big hair and hiss were normal.
The studio’s microphones gave our voices a slight reverb, and I didn’t want to add to or remove that. I also could have played with the equalizer, but that would change the quality and texture of the recording. I really wanted to preserve the authenticity of the recording and avoid making it sound as if it were digitally manipulated.

When listening to the restored version, I thought the result was stunning. It had the presence, tonal quality, and feel of our original 1976 recording. I was immediately transferred back to that time in the control room on the top floor of the Hazleton National Bank Building.
Deeper Cleaning
Now that our spoken voice was less aged and distorted from the tape, I decided to do a little more to make it sound even better. Being that it was an AM radio station, all the songs on my tape were in mono. Because this would be played through stereo speakers at the reunion, I figured it would be nice to have the sound like it was from an FM station and all the songs were in stereo.
Obviously, I couldn't go back and make stereo versions of the songs very easily. Instead, I went to YouTube, found a stereo version of the exact song and laid it in the timeline. As a side note, what I was doing in using YouTube as a source for copyrighted music might be considered a violation of copyright law. Even though I would say this falls under fair use, there's so much gray area, just know that I’m not in any way condoning copyright infringement.
Standard practice in those days was to talk over the intro of the song and stop talking once the vocals started. So, I would keep the original monaural version of the song under our voices and carefully mix in the stereo version. This took a little manipulation and playing around with levels. After sliding the various tracks ahead or back a few frames, you would never know that the stereo version wasn't the one we originally played. It was the version we played, but because it was AM radio you didn't hear it.
The last thing I had to do was to enhance the material on the program when we did the Dickie Goodman-type interviews. For those of you not old enough to remember, he was famous for asking a question and having the answer being a short excerpt of a song.
When I originally created this in 1976, I would speak my question, put the recorder on pause, find the exact excerpt on the record, and play that portion of the 45 while recording it. There would always be a click or a pop after I would finish talking and before the music would start.
The only way to correct this was to physically cut the tape. The offending click would be removed, and the tape was spliced back together. This job wasn't perfectly done by my 18-year-old hands, so on the Premiere Timeline I was able to use the Razor tool, remove any portion of the click that may have been there, and add a two or three frame audio dissolve. It now sounded much better than it did in 1976.
The last step was to render the timeline, export it as a digital file, and burn a CD. Sadly, a 90-minute program does not fit on a 700 MB CD (roughly 78 minutes). Going back to the original file, I did a fade out at approximately 45 minutes into the program and created a second 45-minute program to put on a second CD. Yes, I probably could have made everything fit on one CD if I lowered the bit rate, but because I spent so much time enhancing the quality of the recording, I didn't want to lose that by cramming all that information onto one CD.
[Capturing the Audio Content 'Explosion']
All this effort took a lot of time, but I was very proud that I still had the original recording, and that with modern technology I could make it sound as good (or better) as it did back when it was originally created.
I dropped the CDs off at the reunion, and during the event they were played in their entirety. Honestly, I don’t think anyone noticed the stereo effect, the warmth of the recording, or that all the glitches had been removed. For them, it was just a vintage time capsule playing in the background. Only I knew that it sounded as good as it did back then—and what it took to get it that way.
Chuck Gloman, Associate Professor, has more than 40 years of experience as a producer and director of photography with more than 900 TV commercials, 250 corporate videos, and 100 documentaries to his credit. His films have aired on HBO, Cinemax, and network television. He is the author of Placing Shadows: The Art of Video Lighting, 2nd Edition (Focal Press: 2000); No Budget Digital Filmmaking (McGraw-Hill: 2002); 303 Digital Filmmaking Solutions (McGraw-Hill: 2002); 202 Digital Photography Solutions (McGraw-Hill: 2003); Placing Shadows: The Art of Video Lighting, 3rd Edition (Focal Press: 2005); Scenic Design and Lighting Techniques (Focal Press: 2006); Working with HDV (Focal Press: 2006); Placing Shadows: The Art of Video Lighting, 3rd Edition (translated in Japanese Language Focal Press: 2007); and Placing Shadows: The Art of Video Lighting, 3rd Edition (translated in Chinese Language Focal Press: 2017). He has published more than 500 articles.
