How to keep out of trouble and stay in control.
Commissioning an AV control system can be a tedious and time-consuming process. It should be done systematically. As we build our “future-proof” classrooms of tomorrow, a few mysteries remain. Somehow, the amount of equipment utilized in classrooms and boardrooms has shrunk, and yet, we are capable of doing more than ever before. We’re frequently seeing analog routers and switchers with all the RGBHV wire and distribution being replaced with newer products with single, point-to-point connectivity over Cat5.
It seems we have streamlined the system connections and processing with single boxes doing multitasking functions, like Biamp’s Nexia audio processors and Crestron’s DMPS series, multimedia controllers. Building these systems has been getting easier as our familiarity with the new line of equipment grows. Controlling these systems however has not become any easier. With more functionality of the equipment and higher system expectations from customers, and controls for the systems have become complex. This is why I have developed ten tips for troubleshooting and commissioning AV control systems that will help us keep out of trouble and stay in control.
In order to troubleshoot an AV system and be successful, there has to be accurate documentation. A good set of drawings includes audio, video control, power, rack elevations, conduit runs if applicable, as well as any pertinent notes pertaining to the system. The note field should contain things like IP and Mac addresses, 232 pinouts for specific equipment, wire colors and pinouts for any custom cables made. Labelling and numbering on these drawings should be clear and legible. Remember too, that others may be using these documents to work out system bugs so, the labelling needs to be clear and concise and not in code that only the designer can interpret. Test all cables before you assume that the problem is equipment failure. A Cat5 tester, audio and video signal generator and a multi meter are the most likely aids to carry in the toolbox. Having a couple of Cat5 cables and a couple of Db9 serial cables (one straight through and one with pins 2 and 3 swapped), are also good additions to the troubleshooting arsenal.
Save time and patch it
One of the best tools I’ve found for saving time while troubleshooting is a patchbay. Color-coded Cat5 wire coming into and leaving the rack will help keep signal types separated and help avoid making the wrong connections. Cameras, projectors, monitors, auxiliary inputs, and all other network connections happen here at patch. Having these connections at the front of the rack saves having to get behind it to reroute or bypass pieces of equipment for troubleshooting.
Color-coded jacks and wire
Color-coded jacks and wire, as well as labeling, will also reduce confusion and help keep signal use and types straight.
Control systems are still using single ended data and control signals (RS-232) serial, for communication between devices. If you build your own cables, be sure pins 2 and 3 are situated so that the transmit pin on the controller end of the cable connects to the receive pin on the device being controlled. Check with the manufacturer’s manuals to get pinout information. Get this one wrong and nothing works.


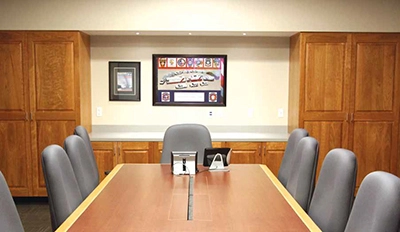
(Left) An intuitive control system at the Williamson County EOC in TX, and (right) an example of an organized patchbay and equipment rack.
If you use newer control systems installed in the past two to three years, you should have your IT department manager’s phone number on speed dial. Working with the IT department to establish a list of MAC addresses and port locations can really save time and some headaches when things stop working. One missed keystroke on a keyboard can reallocate a port in the server and take a control panel off line, or some other vital piece of gear will be dropped from the network.
Don’t panic
When we get trouble calls to rooms, many times we presume the worst. I had a call to a classroom because the confidence monitor at the back of the room didn’t turn on. I checked power, control, network connections to Tx and Rx devices with no results. I walked to the front of the room and found the touch panel in “Presentation” mode. The confidence monitor was not programmed to come on in that mode. It only came on for teleconferencing and class capture operation. After checking with the programmer, I found that this was normal operation. Point — can’t fix it if it’s not broke. Knowing the system expectations will help us in trouble shooting or if in fact there is a need to do so.
Commissioning an AV control system can be a tedious and time-consuming process. It should be done systematically, and taken in pieces. Look for documentation stating system specifications and understand what the system expectations are.
Commissioning AV control systems
It is critically important to understand what the system is designed to do.
After reading and understanding what the AV system was designed to do, I set out to ensure proper operation. I like to have a technician help with checking connections, wire to wire. I start at the top of the rack and read off numbers while the Tech physically checks connections at the back of the equipment. This process takes about 20 minutes per rack on average and can save hours of troubleshooting time because of missing or misplaced cables. Cat5 and network cables have been pre-tested for continuity at this time.
After confirming all internal wiring in the equipment racks, I proceed to input devices. At this point, signal path to the proper displays, recording and streaming devices is confirmed. Here also is where a patchbay is handy. A signal generator can be used, at the patch bay, to check signal flow to monitors and projectors. All external sources can be checked prior to switching, routing and processing equipment. If the proper signals do not show up where they are supposed to at this point, the control system programming should be inspected.
After all the inputs are checked and can be seen in their proper places, I check functionality of camera presets, pan and tilt, lighting presets, shades, blu ray menus and search by time functions.
If there is audio processing in the system, open up their associated programs and make sure volume controls work at the touch panel and look at the processor program to make sure unused inputs and outputs are muted to reduce unwanted system noise.
Finally, when I am convinced that I have met the designers and customers specifications, I make one more pass through each button push and layered screen on the touch panel. Look at button names and overall layout of the touch panel. If this were the first time I ever used the system, could I make it work? Does the layout make sense? I had a programmer use compass headings for referencing equipment in the classroom. The touch panel pages called out North and South projectors, southwest and east cameras and so on. Not many people carry a compass to a classroom or meeting space. When commissioning an AV control system remember most users in classrooms today are not AV technicians or engineers. Control systems have been designed to automate and simplify operation of very complex systems. They shouldn’t require engineers and technicians to be present in classrooms, training rooms, and other tech-heavy environments to make them useable for everyone.
Gary Russell is an AV engineer at Bates College in Lewiston, Maine. Gary is CTS-certified as well as Crestron DMC (T, E, D), NEC Certified Projector and Monitor Repairman, Draper Screen field service authorized, Aerospace Video and Photographic Systems Specialist, Mil- spec. Soldering Certificate, Continuing education and credits for Mechanical Engineering and Machine Tool Technology
THE DOs & DON’Ts OF TOUCH PANEL TROUBLESHOOTING
Do:

FlipTops are available with an integrated Crestron TSW-class 5-inch touch screen and include on-board Rava SIP Intercom technology. TSW touch screens deliver HD graphics, bright and responsive capacitive display, and edge-to-edge glass, and Crestron Smart Graphics. Keep detailed versions of all code. For every experiment/test, make sure you make the changes in a new file, or have proper version management. Document what version has what changes made.
Before doing any test/experiment, know what the outcome will tell you. If you don’t know what you’ll do with the outcome of an experiment/ test, it’s not worth doing.
Be organized. Keep clear track of all the tests/experiments you have performed, and all their results.
For Ethernet touch panels, make sure the device has a good network connection. If static IP, are all of the fields set correctly for your network? If DHCP, is the touch panel pulling an appropriate IP address? Can you ping or otherwise connect to it from a PC on the same network?
Most installations will have more than one touch panel interface. If a problem is noticed, see if it exists on multiple touch screens or a single touch screen. If there are 10 touch screens that all display the same issue, the likelihood is strong that there may be a programming issue to be attended to.
If you have a spare touch panel of the same type, remove the problem touch panel and place the spare in its place. If the problem persists, it may help rule out the possibility of a piece of hardware being faulty.
If the problem is visual in nature, take a photo snapshot of the screen. It may help you later should you need to provide a precise description of the issue to someone else.
Don’t:
Do not change more than one variable at a time. If you change more than one, you don’t know which change modified the behavior (for good, or bad)

The Williamson Country EOC features Crestron and Contemporary Research If you have a problem, don’t assume that just rebooting the system will make it okay. The problem may go away for the short-term, but it may return soon after.
Don’t blindly assume that the touch panel is the root cause of the issue. Employ methodical troubleshooting to determine if the touch panel itself is causing the issue, or if it is simply displaying a failure symptom of the device it is connected to. For example, if you can’t switch media sources on a display, is it the touch screen or the switcher?
Don’t assume a problem is fixed without vigorously exercising the system after corrective action has been taken. You may have only reduced the occurrence of an issue, or perhaps have inadvertently introduced another issue elsewhere.
Don’t take secondhand information as gospel. Sometimes issues are mistranslated as information gets based along between people. Where possible, separate facts out from speculation and conjecture. An exasperated end user may perceive that a touch panel has a problem every day, whereas system logs may show that a problem occurs only every two to three days. Goal being not to diminish the users dissatisfaction, but to have the clearest facts available to inform your troubleshooting.
Source: Crestron (www.crestron.com)
