Here’s how to get it right on the first try.
Wherever it’s mounted, the projector must be properly
ventilated and absolutely level. Large-venue projectors are not only bigger and brighter than typical boardroom or classroom projectors, but they have different objectives, and they can take longer to set up. As a result, optimizing one is as much of an art as a science. After working with the biggest, best-in-class projectors for a decade, I’ve honed an installation routine that streamlines the process and makes sure that I won’t have to return to tweak the image. Regardless of whether it’s for an auditorium, lecture hall, or a house of worship, a large projector has the unique ability to completely transform the space and audience experience, elevating a visual presentation. Here’s how to get the install right on the first try.
The Right Stuff
A good installation starts with a projector and lens that best suit the room. While you can rely on a floor plan to figure out your throw-distance, I prefer to get out a tape measure and measure the distance myself.
With that info and the screen size, I use the manufacturer’s throw chart to pick the right lens and screen material. Good resources are Digital Projection’s online calculator and Draper’s Screen Surface Selector app.
Because these projectors can weigh upwards of 100-pounds, it’s not a solo job. Plan on having two or three people handy to unpack it and safely get it into place.
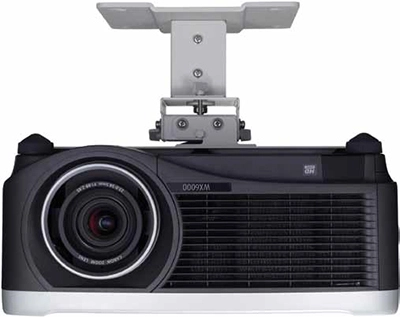
Regarding lumens, generally speaking, the higher the lumen rating of the projector, the greater the flexibility in terms of ambient light levels and projection distances, says Canon USA’s Len Musmeci. However, for better quality images, a good contrast ratio of at least 2,000:1 is also important. A constant aperture zoom lens, such as the type used in certain Canon REALiS projectors, helps improve image quality by preventing brightness loss, even when the projector has to be positioned further from the screen in order to accommodate larger audiences.
Location, Location, Location
Just like real estate, location is the most important factor in setting up a large venue projector. Chances are that you’ll be using a shelf, a dedicated projection room, or a ceiling mounting bracket. Regardless, the projector needs to be as close to centered on the screen as possible. Large venue projectors can correct for being off-center, but we’ll get to that later. This class of projector generally delivers at least 5,000 lumens of brightness, but if there’re windows nearby—such as in a church—you might need to get an even brighter projector for daytime use.


Eyeballing the projected image might be tempting, but always use a bubble level, slope detector, or inclinometer when leveling your projector.
Hide the Cables
Obviously, you’ll need to have networking, video cables, and a dedicated power circuit nearby. This is good time to take a few minutes to hide the projector’s cables. Projectors, like Epson’s PowerLite Pro Z series, have integrated places to stash the wires, but you can also put them into a cable box that has slits in it for the cables to enter and exit. The best bet, though, is to have a small utility cabinet built into the wall next to the projector with enough room to stick the extra cables. Either way, start by stretching the cables out and tying them together with zip ties, Velcro straps, or electrical tie-wraps to prevent tangling.
Level the Projector
You can’t expect to get a sharp and square image unless the projector starts out being flat and level. Because everything looks level when you’re on a ladder, it’s best to use a bubble level or inclinometer to make sure. Be sure to use the level on a flat portion of the projector’s case and adjust the height of the projector’s feet until it is level.
Let There be Light!
The preliminaries are over. It’s time to turn the projector on and aim its beam at the screen. At this point, it’s a good idea to use the projector’s built-in test pattern. If it doesn’t have one, use a pattern generator, a notebook, or tablet displaying a test image (www.walvisions.com has a nice selection).
Zoom in and out to get the projector to cover the entire screen with a little overlap. Happily, in most cases you can climb down the ladder and do everything else at ground level with the remote control.
If the remote control is out of range, a great trick is to use an off-the-shelf audio cable with a 3.5-millimeter jack as an extension cord.
Square off the Image

Right now, you probably have a trapezoid-shaped image that doesn’t look particularly good. This happens when the projector’s beam isn’t exactly perpendicular to the screen, but you can use the projector’s auto keystone correction to fix it. Start with the vertical keystone correction control in the projector’s menu to compensate for the angle of projection; some remote controls also have dedicated buttons for this.
When you’re done, move on to the horizontal correction if the projector’s beam is not square with the screen. Don’t worry if this makes the image too big or too small for the target screen. We’ll get to that next.
Zoom, Focus, Shift
Most large venue projectors have powered-zoom, -focus and lens-shift mechanisms that can help optimize the image’s size and position. Start by using the lens shift mechanism to center the image on the screen and then fine-tune it by using the zoom control to just fill the screen. Take your time and don’t worry if you need to repeat these steps a few times before it looks perfect. When you’re ready, take a few minutes to focus the image using a more detailed image that includes small type. If you can read it, chances are your focus is good.
Installing large-venue projectors is as much of an art as a science. Color, Brightness and Contrast Adjustments

Using a plain white image, adjust the color temperature to get to a bright white projected beam. You might want to cycle through the temperature choices that the projector provides, looking for the best balance. Remember that 5,000K corresponds with a sunny day and the higher the temperature the cooler and bluer the image will appear; most projectors look best set to 6,500K. Next, using an image of color bars, raise the brightness if it looks dull and if the colors are either not saturated enough or too saturated, try adjusting the gamma control up and down. Finally, try out a photo or video with dimensional flesh tones, sky, and green.
Measure
Everything looks good, right? Um.…not quite. This last task will help save some time in the future.
Get out a light meter that measures in lux units to assess the brightness with a white image.
Take readings in nine—yes nine —places (on a three-by-three grid) and average the results to mirror the ANSI lumens test.
Finally, divide the average brightness by the ratio of the projected image’s area (length X width) in meters to a square meter; the final result will be in lumens.
Repeat the test every few months, and if your brightness drops significantly, it’s time to change lamps before they blow out at the wrong moment. Keep detailed lifecycle records that are easily accessible when you and your team need them.
Time to Shine
It’s time for the projector’s dress rehearsal by setting it up how it will be used day-to-day. Run through video clips, project slides or images, and if you’re going to be using live video, test with people on stage. When I think I’m done, I like to walk around the room and sit down in several different random seats to make sure everyone will have a good view. This is the time to give the projector a final adjustment or tweak. If everything checks out, the last thing to do is to turn it all off, and go get that well-deserved cup of coffee.
Brian Nadel is the erstwhile editor-in-chief of Mobile Computing & Communications magazine.
Five essentials for a bright, unobstructed projected image.
Step 1: Darken the room & control the light.
Ambient light—any light that doesn’t come from the projector—is a problem for commercial spaces because in many applications, high levels of ambient light are required— in order to achieve their purposes, houses of worship, classrooms, meeting rooms, lobbies all require a significant amount of ambient light. Sunlight streaming in through glass windows is the most common source of excessive ambient light. Consider motorized shades, blinds, or blackout curtains when the projector is activated. The second most common source of ambient light is generated by room lighting, which may be required in order for people to see meeting materials or other participants while they view projected content. Lighting dimmers can also be added to the AV control system. Also, make sure that light fixtures near the screen (either on adjacent walls or the ceiling) can be controlled separately from the other fixtures in the room. Reducing light near the screen will reduce the contrast ratio, making the image easier to see.
Step 2: Screen selection.
Matte white screens provide the greatest range of viewing angles, but they are less efficient than beaded or lenticular screens in terms of brightness. When viewing angles can be controlled, beaded or lenticular screens provide excellent brightness and contrast. The choice of screen material largely depends on the type of screen in use: Retractable ceiling- or floor-mounted screens require flexible materials that can be rolled up for storage, while materials for permanent wall-mounted screens must be chosen depending on the needs of the presenter for practices such as writing on the screen with erasable markers, etc.
Step 3: Screen location & seating requirements.
Stadium-style seating, in which each row of seats is higher than the row in front of it, is optimal for projected images because there are fewer obstructions and potentially more legroom for viewers. However, with flat floors of the type typically found in ballrooms, classrooms, and conference rooms, proper screen height and staggered seating—where each row of seats is slightly offset relative to the row in front of it—can help to reduce obstructed views.
Large ballrooms should have a screen positioned so that it is easily visible to either a standing or seated audience. Meeting rooms should have the screen positioned in a way that the people sitting closer to the front of the room will not eclipse the image from those in the back.
And, of course, know the basics of the inverse square law.
Step 4: Select the right projector features for your application.
Generally speaking, the higher the lumen rating of the projector, the greater the flexibility in terms of ambient light levels, projection distances, etc. However, for better quality images, a contrast ratio of 2,000:1 (at the very least) is important. Additionally, features like constant aperture zoom lens and LCOS technology can help improve perceived image and detail by eliminating the “screen door effect.”
Step 5: Automate & control.
Integrate your projection with a control system for optimization and ease-of-use for the entire staff. MostAV control systems can control motorized shades, blinds, or blackout curtains automatically, as presets, when the projector is activated.
