Tips for Saving Time On A Typically Time Consuming Process
SoundTube SpeedWingBetween cutting holes in ceilings, extra wiring hoops, and necessary interaction with other subcontractors, installing ceiling speakers can seem like a necessary evil. But don’t despair, manufacturers are doing their part to address this common challenge and make your life as an integrator easier. SCN reached out to find the best tips, techniques, and technological innovations that help integrators save time installing ceiling speakers.
At Tannoy, we have long understood and acknowledged the need to make life as easy as possible for the integrator when installing ceiling speakers. Often, given the volume of products required for these applications, installing ceiling speakers can be a time-consuming and laborious process; that’s why we developed various innovations in our CMS range, which simplified installation. Our spring-loaded clamp mechanism, coupled with the fact that all accessories come in the box, means that installing these units is always fast, simple, and cost effective. And because our point-source transducers have such excellent dispersion characteristics over a wide bandwidth, fewer speakers are required to fill a space effectively. Future trends I can see emerging is the increased use of magnetic grilles, which are cosmetically appealing to architects and extremely fast to install for integrators, and [they] can be extremely flexible when custom painting is a requirement for the application.
—Mark Copeland, Product Manager, Install and Tour, TC Group
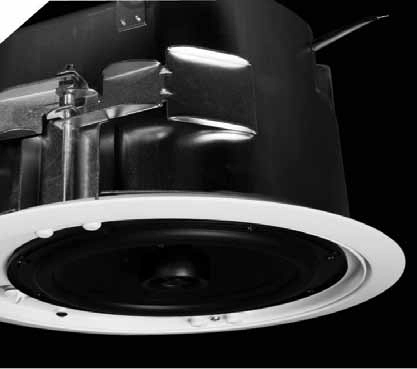
Quick installation is key to an integrator being able to show a profit on a job. That’s why SoundTube developed the SpeedWings that you’ll find on all of our in-ceiling speakers. These proprietary attachment ears fold flat against the speaker to allow it to fit easily through the cutout hole, but then fan out and move down automatically to grasp the ceiling material when you turn a screw with a power driver. They’re fast and efficient, providing the rapid installation an integrator wants.
—Duke Ducoff, MSE Audio VP of Sales, for SoundTube (a subsidiary of MSE)

Community Distributed Design D-Series
For drop ceilings, lay-in tile speakers are the kings of quick install, which can add up to big labor savings for the installer. Depending on the scope of the project and the crew’s expertise, installation can be as much as five times faster than installs using standard speakers that require round cuts. Lay-in tile speakers, like Lowell’s LT Series, come in 2x2 or 1x2 formats. The 2x2 drops easily into the ceiling grid. Lowell’s 1x2 format includes a patented integral T-bar that can be installed with a single straight-cut to ceiling tile; the 1x2 drops into place and the T-bar supports adjacent (non-tegular) tile. This saves time in new projects as ceiling installers are typically willing to make the simple straight cuts, and a single cut can be used for two locations. In retrofit jobs, straight cuts reduce the risk of damaging old, brittle tile that may not stand up to round cuts.
—Jeff Garstick, National Sales Manager, Lowell Manufacturing Company
The greatest loss of time and expense when installing ceiling speakers is having to revisit the site for a service call. The best way to prevent that expense is to use a true commercial manufacturer with a proven track record of rock-solid performance. I recommend looking up when you are in a major transportation facility to see what speakers are being used. Their systems are truly mission-critical and they rely on products they trust. Other things to look for include: a 1x2 lay-in speaker that allows the installer to only cut 12 inches off the end of the ceiling tile and reinstall rather than having to cut a hole; Phoenix style removable connectors for easy wiring; speakers that ship with all the accessories needed for installing into a drop ceiling or dry-wall ceiling included in the box.
—John Ivey, Senior Vice President of Sales, Atlas Sound

QSC AcousticDesign AD-C42TCeiling loudspeaker installation typically brings AV integrators together with electrical and construction contractors. To save time and avoid errors, the AV integrator should supervise the entire project from initial wiring to loudspeaker installation. To help coordinate this complex process, Community’s Distributed Design D-Series back can and face may be installed at different times. Both D-Series and Commercial Design C-Series offer accessories for suspended ceiling or drywall installation, loop-through Euroblock connectors to speed wiring, and drop-stop tabs for easy, fast installation.
—Julia Lee, Director of Sales and Marketing, Community Professional Loudspeakers
First, select the best speaker by using software like EASE Address, which can be loaded with product libraries from several manufacturers. If your application is primarily speech, you can find models with coverage approaching 180 degrees in that range. These will cover the room with fewer units, reducing your installation and product costs. When it comes to the actual install, prepare the locations by pulling wire and cutting openings at the earliest possible date. If you use rough-in kits and pre-wired connectors, the actual installation becomes literally a snap—and a few turns of a screwdriver.
—Bob Rieder with Electro-Voice
New loudspeakers are emerging on the market with specific design features that allow for division of installation labor to maximize efficiency and cost savings. The Extron SpeedMount ceiling speaker eliminates wasted time spent building up multi-part ceiling speakers since there are only three parts: the enclosure, speaker cartridge, and the grille. AV contractors can also partner with low voltage contractors to have the enclosure installed during the construction “rough-in” phase. This saves a lot of time for the AV contractor and leaves a simple procedure of securing the speaker cartridge into the enclosure.
—Joe da Silva, Director of Product Marketing, Extron
Ensuring that you have all required hardware and tools prior to the actual install is paramount. Mentally assembling or installing a system is a good way to start. Once onsite, creating a clean and defined workspace with low traffic to stage an assembly area will make things go much smoother. An empty loudspeaker carton used as a worktop for cutting tiles and allowing cutout to fall inside is a great way to maintain a clean work area.
—Travis Nie, Systems Application Engineer, QSC Audio Products
Our tile bridges need no adjustment, so they are quick to install. They fold to fit through the speaker cutouts for easy installation in blind-mount situations. The tile bridges ship in the same box as the speaker, so installers need not keep track of pairing separate boxes around the jobsite. The Saros speakers feature bezel-less magnetic mounted grilles so that no tools or hardware are required to mount them during installation. The easily removed grill also makes adjusting the front mounted transformer tap switch a snap. Four-pin Phoenix connections are supplied for speaker connection, so the speaker wires can be terminated before speaker mounting and simply plugged in. The four-pin arrangement makes it easy to daisy-chain the wiring too.
—Denis Fink, Product Manager, Audio Solutions, Crestron

Yamaha VXC SeriesMake sure the speaker comes with a speaker layout tool that is easy to use, and based on actual EASE data. This will help determine that the results will be as expected. Look for features like anti-drop tabs, [which] hold the speaker in place until you can tighten it, and double threaded screws, [which] decrease the number of driver turns to tighten it to the ceiling. In addition to designing a fully integrated solution including compatible DSP, control, and amplifiers, these are some of the critical features that Yamaha looked at while designing the CIS (Commercial Installation Solutions) VXC line of ceiling speakers that will greatly affect installation time.
—Steve Seable, Systems Design Engineer, Yamaha Commercial Audio Systems
The Penton Audio USA CCS4 and CCS6 Series were designed for high end audio installation where full impact bass output along with high sound pressure levels is imperative. The speaker is situated in a sealed metal back box with a UL Plenum compliant wire connection on the back of the back-box. Phoenix style terminal blocks quickly and easily connect to the speaker and also offer a pass-through connection for continuing the line to other speakers.
—David Selsberg, Director of Operations, Penton Audio
ISP Technologies HDDS series powered ceiling speakers offer the installer a savings in both time and labor by virtue of its innovative design. The HDDS CS650P plenum rated and CS651 non-plenum rated ceiling speakers make install fast and easy with simple plug and play connections delivering both power and audio over Cat-5 cable. Up to 12 speakers can be daisy chained over a single run of Cat-5 cable, delivering superior performance to 70-volt systems.
—Buck Waller, Founder and CEO, ISP Technologies

